Speed of Sound Technologies

Mobile Enhancement Experts in Milford CT

55 Woodmont Rd., Milford, CT 203-954-0066
  • Home
  • About Us
  • Services
    • Car Audio
    • Custom Installation
    • Driver Safety
    • Radar/Laser Detectors
    • Remote Starters
    • Truck Accessories
    • Vehicle Security
    • Window Tint
  • Location and Directions
  • Contact Us
  • Facebook
  • Instagram

The OEM Audio Upgrade Path

OEM Audio UpgradeYears ago, when someone wanted to make their car stereo system sound better, they bought a new radio. With the complexity of modern infotainment systems, upgrading your radio isn’t always possible. So, what’s a music enthusiast to do? As it turns out, the radio is the least of your worries – unless, of course, it happens to be broken. Read on to find out more about our tried-and-true OEM audio upgrade path.

The Weakest Link

What is it about factory stereos that enthusiasts don’t like? Ask most of them, and they’ll tell you that the system doesn’t play loudly enough and that it doesn’t produce enough bass. Rather than muck around with expensive source units and complicated integration modules, why not simply address the weak points?

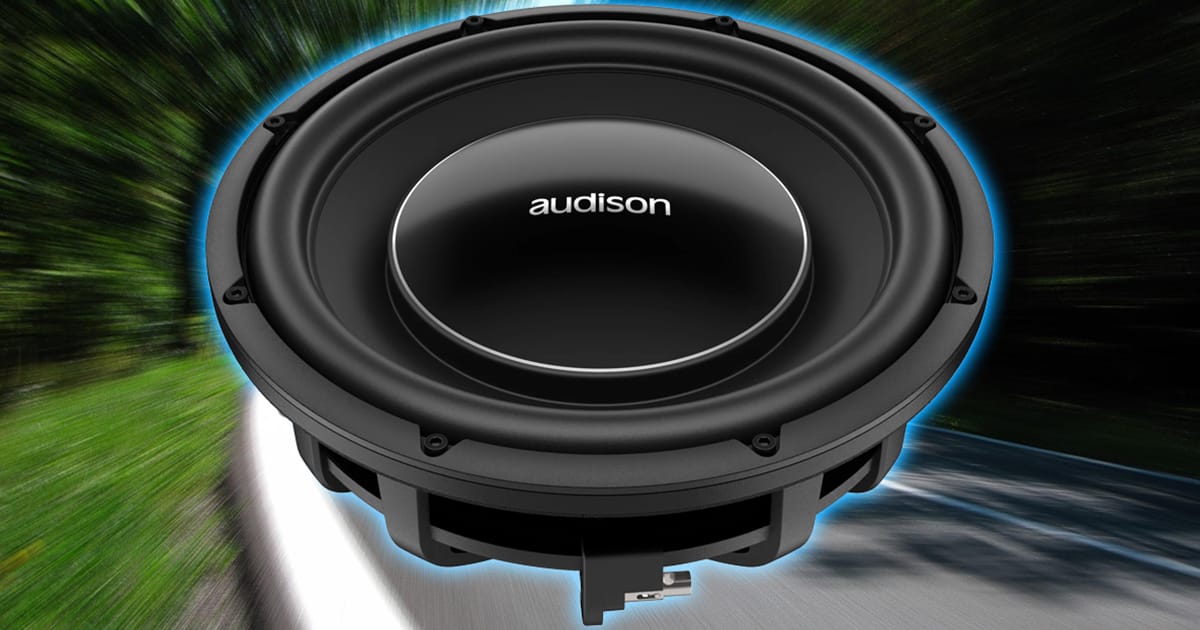
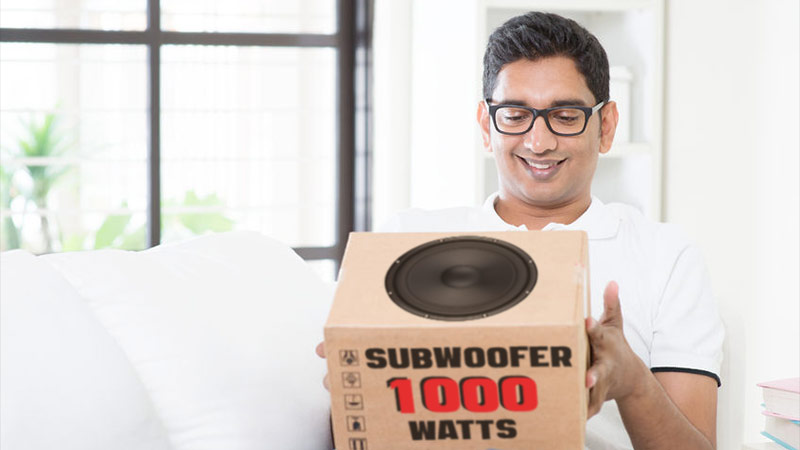
Step 1: Add a Subwoofer

OEM Audio Upgrade
Vehicle specific enclosures like this Stealthbox from JL Audio take up minimal space and sound much better than a factory subwoofer.

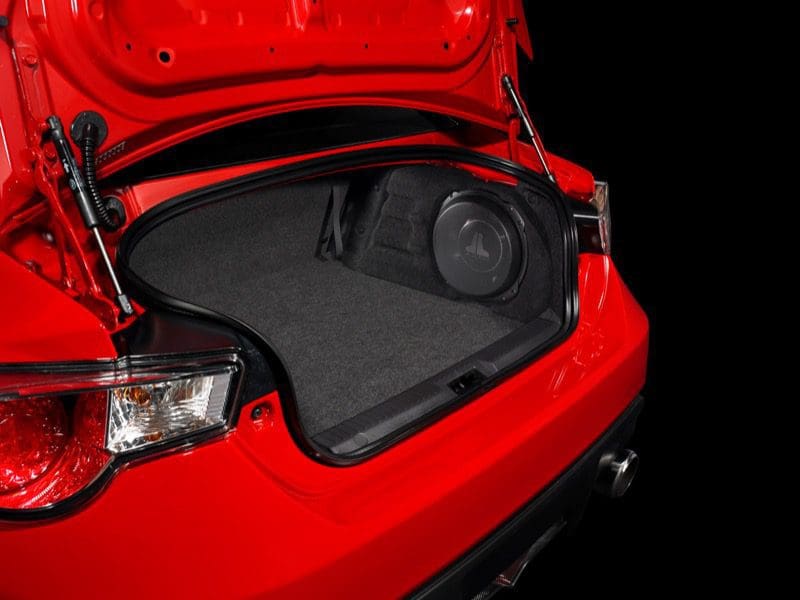
Subwoofers get a bad rap. The stereotype is that they are very large and are only good for making mirrors shake and the trunk lid vibrate. The reality is that a subwoofer is a fundamental component of a truly great-sounding audio system upgrade. Even in a Mustang or Corvette with 8- or 10-inch door speakers, adding a properly designed subwoofer system will result in a massive improvement.

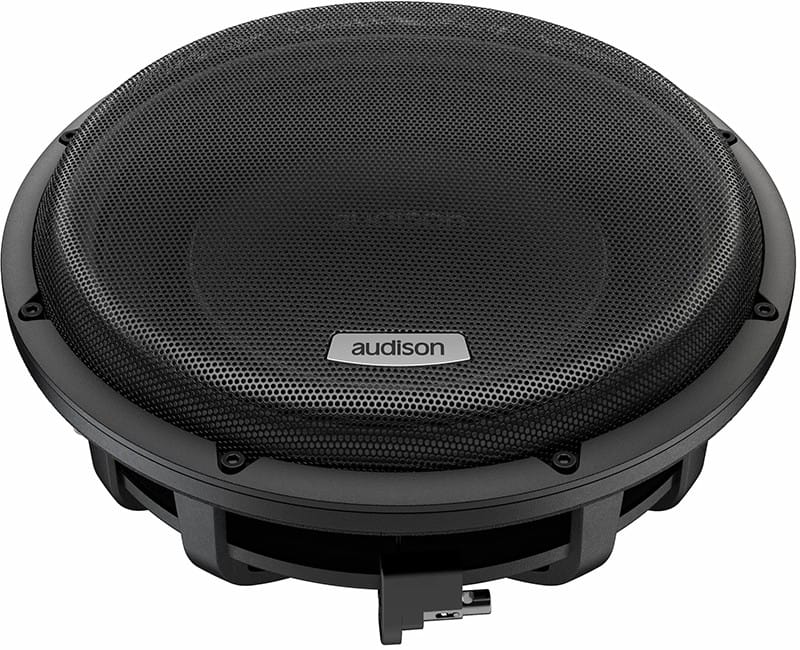
Before you get hung up on losing your storage space to a subwoofer system, there are many options for extremely compact solutions that take up little to no room at all. Several companies offer compact powered woofers that will fit under a seat. These solutions can warm up your sound system nicely.

The next step up in performance would be an enclosure that places a sub in an existing storage area. Many companies offer vehicle-specific solutions that use fiberglass or roto-molded plastic enclosures. Some of these solutions include an amplifier and vehicle-specific wiring that makes the installation quick and easy. These systems typically feature an eight- or 10-inch subwoofer. The result is solid low-frequency extension and great output up to moderately loud listening levels.

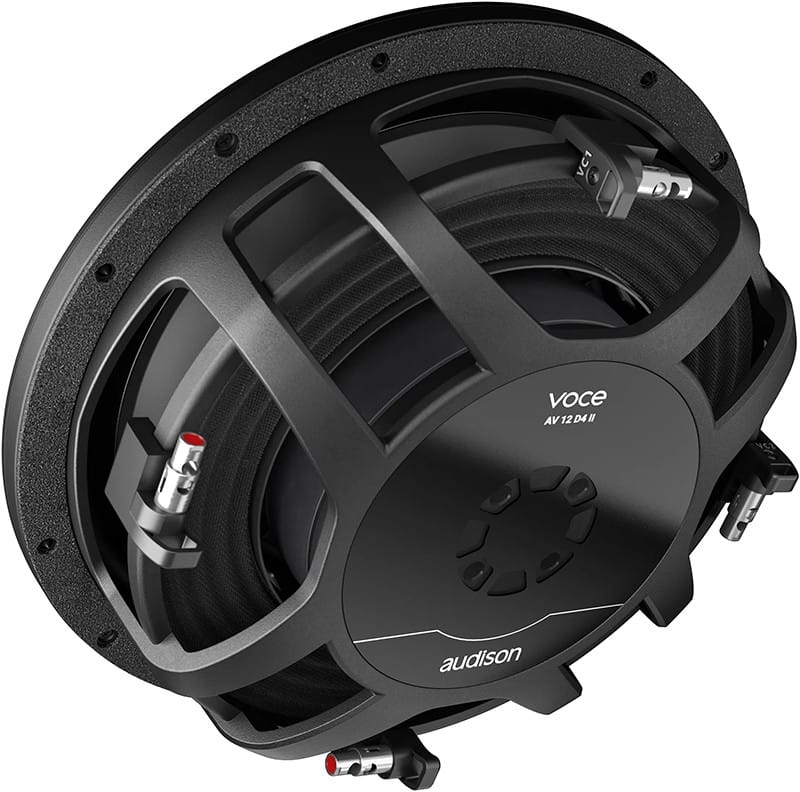
If you are searching for the epitome of subwoofer performance, your local mobile enhancement retailer can create an enclosure that is specific to your vehicle and your requirements. From an audiophile-grade single sub in a compact sealed enclosure to something with two or more high-excursion drivers in a large vented cabinet – your choice depends on your expectations. Listen to a few systems and decide what’s right for you.

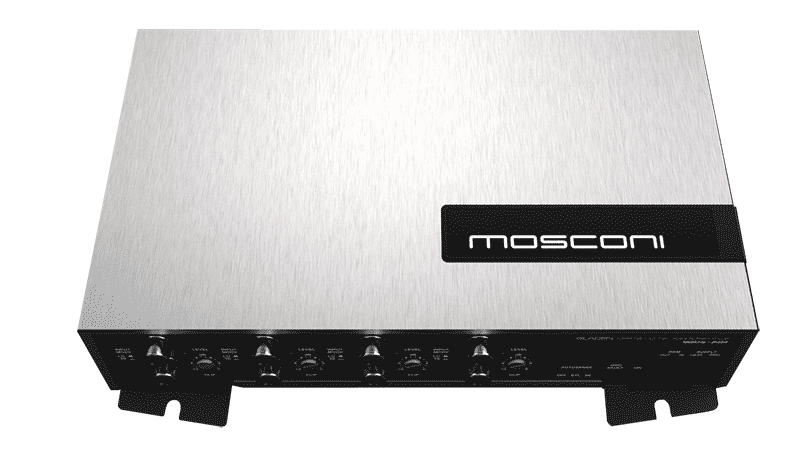
Step 2: Add an Amplifier

We’ve addressed the bottom few octaves of our system with the subwoofer. The next step is to add an amplifier to the midrange and high-frequency speakers. If your factory stereo doesn’t have an amplifier, then you are likely only getting 18 to 20 watts of real power to each speaker. Even a modestly powered amplifier will provide about three times as much power. With more power, your stereo will sound better at higher volumes. The garbled distortion that plagues most factory stereo systems when you turn up the volume will be gone.

Because most amplifiers include an electronic crossover, your installer can filter out the bass from your smaller speakers. This filtering allows your small speakers to do a much better job of reproducing midrange and high frequencies – both clearer and louder.

I’d Like to Order the Combo, Please

OEM Audio Upgrade
This Kenwood eXcelon XR900-5 can power an entire system.

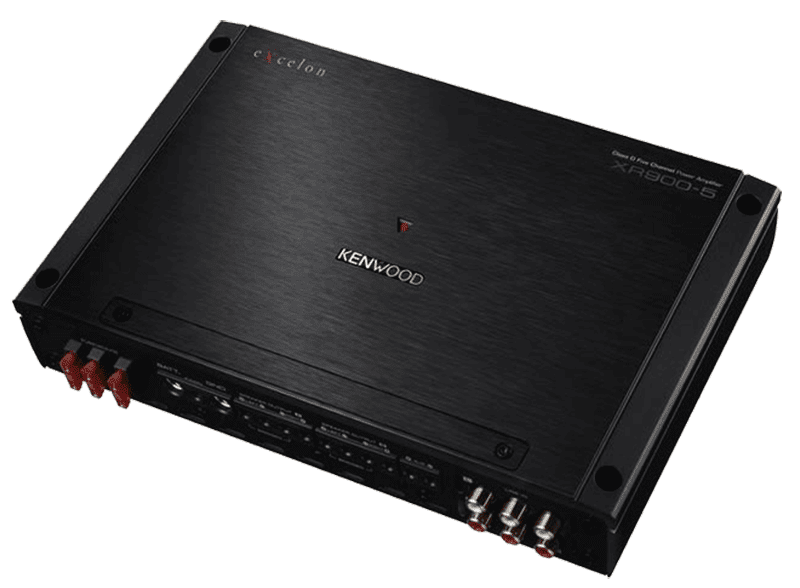
If you know your ultimate goal for your sound system will include a subwoofer and an amplifier for the speakers, you may want to consider buying a five-channel amplifier. These amplifiers include four discrete channels for your front and rear speakers and a high-power channel dedicated to powering a subwoofer. By combining your amplification requirements into a single chassis, your installer will be able to install it faster, and you won’t need any power distribution components.

Step 3: Upgrade Your Speakers

OEM Audio Upgrade
The Audiofrog midrange driver offers significant improvement over factory speakers of its size.

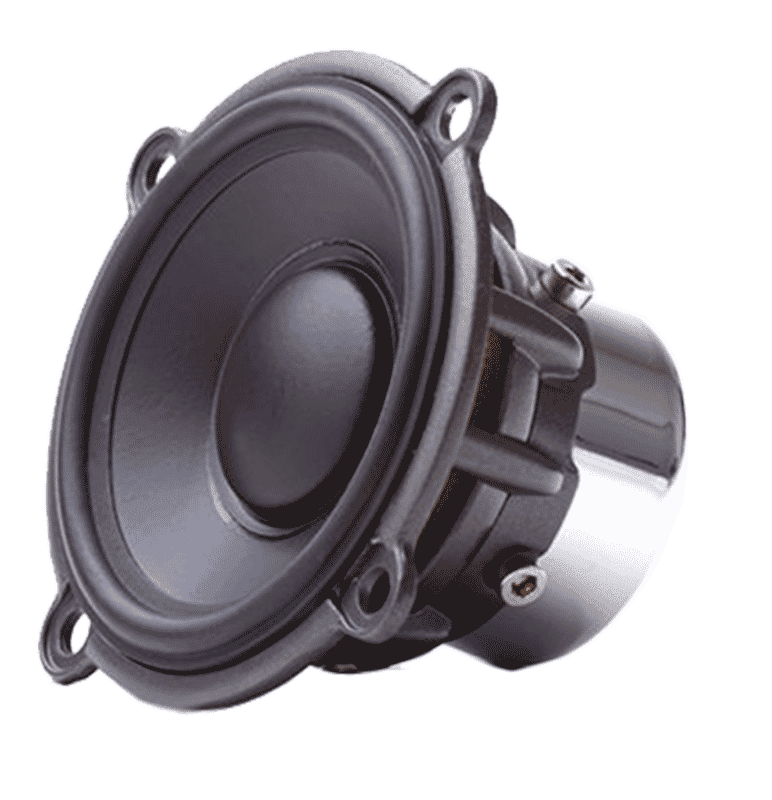
Once you have an amplifier, it’s time to upgrade your speakers. Though there are arguments for a speaker upgrade as an early part of the process, speakers need amplifier power to shine. Connecting a set of components to the little amplifier built into a radio simply doesn’t do them justice.

Premium aftermarket speakers not only provide smoother frequency response and less distortion than OEM speakers, but their increased excursion capabilities will allow them to play louder – but only when they have adequate power.

Choosing a set of speakers can be very difficult. There are thousands of options available from hundreds of manufacturers. Most retailers carry one or two high-end brands, each with a variety of options in each speaker size. While it is often easier to buy well-known brands, many companies put more effort into marketing than they do into developing speakers that sound amazing. We suggest auditioning as many speakers as possible, using the same selection of music each time. After a while, it’ll be easy to hear the difference between a great speaker and one that is marketed well.

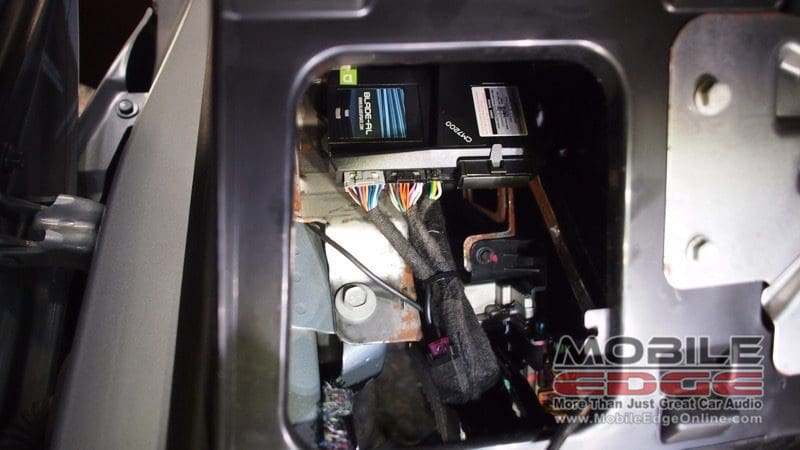
Installation Matters

OEM Audio Upgrade
This speaker installation by Adrenaline Autosound depicts best practices in speaker installation.

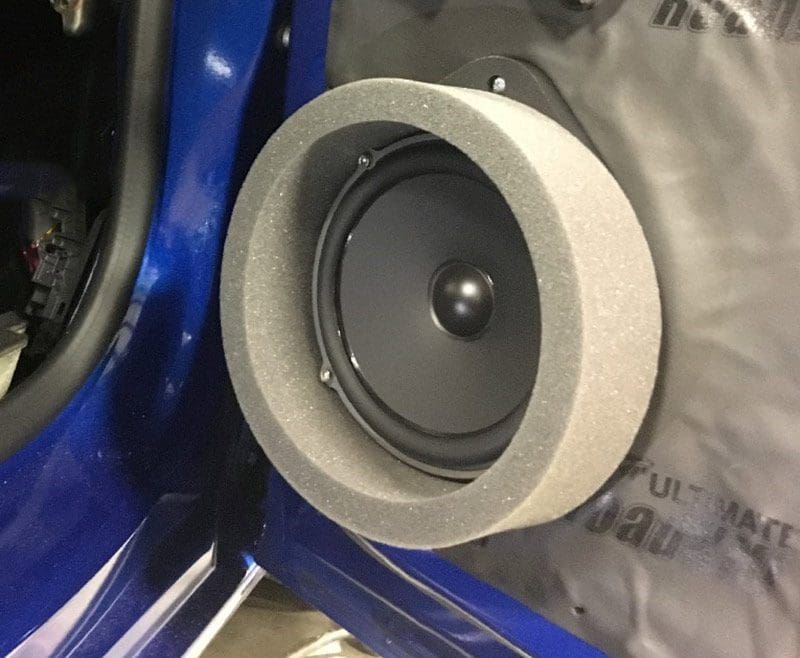
Unlike a new Bluetooth speaker from the local big box store, the performance of your mobile sound system depends significantly on its installation and configuration. Amplifiers require properly sized high-quality wiring. Electrical connections need to be mechanically secure and properly protected. Speaker installation has a dramatic effect on their performance. Solid mounting adapters that are water-resistant are an absolute must. The option to add sound damping material to the doors or foam coupling rings to the front of the speakers is also a sign that the shop you are dealing with cares about the performance of your system.

Amplifiers need proper configuration. Each source has different voltage capabilities. These voltage capabilities determine how the sensitivity controls on your installer will configure your amplifier, and ultimately, how loud the system will play without significant distortion. Crossovers need to be set properly to protect small speakers from damage while still ensuring your system sounds great. Many technicians make the process look easy, but it takes years to learn the art of proficient system configuration.

The Next Steps

OEM Audio Upgrade
Mosconi processors are some of the best in class.

Though we’ll save it for a future article, the next step in upgrading your OEM stereo system would be to add a digital signal processor. A properly tuned processor will allow your installer to compensate for speaker placement and reflections and resonances within the vehicle. The result is smooth and natural frequency response and a dramatically improved soundstage with impressive imaging.

Upgrade Your OEM Stereo System Today

If you are tired of distorted sound and wimpy bass, drop by your local mobile enhancement retailer and ask about upgrading your sound system. With a carefully planned upgrade path, you can work towards whatever goal suits your requirements in stages. Each stage will provide an audible and impressive upgrade. With each step, your music will sound more lifelike and realistic. It will truly be a case of having heard your favorite songs for the first time, all over again.
This article is written and produced by the team at www.BestCarAudio.com. Reproduction or use of any kind is prohibited without the express written permission of 1sixty8 media.

Filed Under: ARTICLES, Car Audio, RESOURCE LIBRARY

Product Spotlight: Audison AV 12 D2 II

Audison AV 12 D2 II

Subwoofers with minimal mounting depth requirements continue to grow in popularity. To meet that demand, the team at Audison has introduced a larger, more robust option to complement their well-regarded Prima Series. The new Voce II subwoofer line includes ten- and twelve-inch models engineered for higher power handling and increased excursion. In this spotlight, we’ll take a closer look at the 12-inch Audison AV 12 D2 II.

Audison AV 12 D2 II
Audison includes a heavy-duty mesh grille with each Voce II subwoofer to protect them from damage.

Features of the Voce II Subwoofers

As its name suggests, the AV 12 D2 II is a 12-inch subwoofer. It requires only 3.46 inches of mounting depth, making it an excellent solution for trucks or vehicles where space is at a premium.

The D2 suffix identifies its dual two-ohm voice coil configuration. A dual four-ohm version, designated D4, is also available. Ten-inch Voce II models share the same design principles and construction quality.

Audison rates the AV 12 D2 II at 550 watts continuous and 1100 watts peak power handling. This capability comes from a 1.5-inch six-layer copper-clad aluminum wire voice coil. To help keep the motor assembly cool during extended use, the basket and motor structure incorporate Audison’s Airflow Venting Cooling (A.V.C.) architecture.

The woofer is built on a custom-tooled, cast-aluminum eight-spoke frame. Instead of the traditional vent through the center of the T-yoke, the AV 12 D2 II uses four large vents in the bottom plate below the spider. Combined with the air gaps between the magnet and chassis, these openings form part of the A.V.C. system.

Audison AV 12 D2 II
The heavy-duty basket and integrated A.V.C. features ensure these subwoofers can dish out prodigious amounts of bass and will last for years.

The cone and dust-cap support assembly is a one-piece injection-molded polypropylene structure. The dust-cap face piece is bonded and supported around its perimeter just above the fiberglass voice coil former. This design minimizes unwanted flexing or resonance. Audison refers to this reinforcement method as Radial Reinforced Frameworks (R.R.F.).

A single ferrite magnet serves as the motor structure. The six-layer voice coil is connected via tinsel leads, internally supported by the R.R.F. and externally by large spring-loaded terminals mounted to the chassis. These terminals can accept up to 8-AWG speaker wire for maximum current transfer and include labels for which of the two coils they are connected to. There are wire management tabs built into the terminals as well.

Audison AV 12 D2 II
Cutaway view of the Audison AV 12 D2 II subwoofer.

Specifications of the Audison AV 12 D2 II

Digging into performance parameters, the AV 12 D2 II features a resonant frequency (Fs) of 23 Hz, an equivalent compliance (Vas) of 2.225 cubic feet, and a Total Q (Qts) of 0.5. Cone excursion is rated at 16.8 mm, voice coil inductance is 4.3 millihenries, and sensitivity is 85 dB SPL.

We modeled the driver in BassBox Pro using Audison’s recommended 0.957 cubic foot sealed enclosure. The simulation shows an impressive -3 dB point of 38.4 hertz with a system Q (Qtc) of 0.812. The software also predicts solid cone control down to single-digit frequencies at the rated 550-watt continuous input.

Audison AV 12 D2 II
Predicted free-field frequency response of the Audison AV 12 D2 II subwoofer in a 0.957-cubic-foot sealed enclosure.

Upgrade Your Car Audio System Today with Audison

If you’re shopping for a high-performance subwoofer that delivers excellent output, requires very little mounting depth, and features advanced cooling technologies, the Audison AV 12 D2 II should be on your shortlist. Visit a local authorized Audison retailer to audition the 12-inch model or its 10-inch counterparts. They can help determine the best solution for your vehicle and listening preferences. Find an authorized dealer here.

To learn more about Audison’s Voce II subwoofers and speaker systems, visit their website. Be sure to follow Audison on Facebook, Instagram and YouTube to stay up to date with all their latest product releases.

This article is written and produced by the team at www.BestCarAudio.com. Reproduction or use of any kind is prohibited without the express written permission of 1sixty8 media.

Filed Under: ARTICLES, Car Audio, PRODUCTS, RESOURCE LIBRARY Tagged With: Audison

Choosing the Best Car Starter Remote

Best Car Starter

Under the hood, most remote car starters are very similar. Most brands offer two or three different controllers and allow the shop you work with to bundle those units with different remotes, providing varying levels of range and features. In this article, we partnered with the industry-leading remote starter manufacturer Compustar to explain the different options available to consumers. Here’s a simple guide to make choosing the best remote car starter easy.

Shopping for a Remote Car Starter

The shop you choose to install a remote starter is just as important as the hardware and remote you select. Working on modern cars and trucks isn’t as easy as it was decades ago. A modern starter needs to communicate with the engine management system, vehicle body control modules, and factory-installed security systems to function correctly. Making the proper connections and executing the correct programming are tasks best handled by an expert.

If you shop for the lowest-priced remote starter, the chances of issues down the road are exponentially higher than if you choose an expert shop that takes pride in professional installation.

Forego the urge to shop over the phone—visit retailers in your area instead. You’ll quickly get a sense of who is professional and who you should avoid.

1. Remote Start Range

The most significant difference between car starter key fobs is their range. Most modern factory-issued key fobs have a range of a few hundred feet. This means you can likely start your car from across a small parking lot, but you might not be able to start it from inside a store.

Aftermarket fobs range from 1,500 feet to three miles under ideal conditions. It’s better to think of these offerings as power levels. For example, the Compustar CS-925S starter system remote is rated to provide up to 1,500 feet of range. This remote provides two to three times as much power as a factory remote, often doubling or tripling the effective range.

Best Car Starter
The affordable Compustar CS925-S remote starter includes remotes rated for up to 1,500 feet of range.

At the opposite end of the spectrum, some remotes are rated for two to three miles. If you work in a large building, you’ll want the added power of these solutions.

2. Number of Buttons

Remote car starter fobs are available in two styles based on the number of buttons: one-button and multi-function.

One-button remotes are a good choice if you will continue to carry a factory remote that includes a trunk release button. The factory remote often serves as the vehicle’s key and is required to start the car or truck.

Multi-function remotes have four or five buttons that provide dedicated access to locking/arming, unlocking/disarming, trunk release, remote start, and auxiliary functions. The number of buttons on a remote doesn’t define its quality or range—only the number of functions you have access to.

Best Car Starter
The Pro 1WG18 remote provides up to 1,500 feet of range and is backed by a three-year warranty as part of the PRO Series.

3. One-Way and Two-Way Remotes

Another key feature to consider is whether you want a one-way or two-way remote.

With a one-way remote, you send a command to the vehicle by pressing a button. If the car is in range, the command will be executed. If you are too far away, nothing happens.

With a two-way remote, any command sent by the remote and executed by the vehicle is confirmed back to the remote. The remote will beep and flash an LED or icon to notify you. You’ll get confirmations for locking, unlocking, remote starting, and other features.

As a subset of two-way remote options, you can pick from LED or LCD visual indicators. An LED remote will have at least one, often three LEDs that flash to indicate when a command has been executed.

Best Car Starter
The Prime 2WG17 remote includes three LEDs that flash to let you know when the vehicle is locked, unlocked, or the remote starter has been activated.

An LCD remote is considered the highest-end option. These remotes use a small LCD screen with icons to show what commands have been executed and the status of your vehicle. For example, a lock symbol on the remote confirms that the vehicle executed a lock/arm command.

Best Car Starter
The five-button two-way 2WQ9 remote has a two-color LCD that indicates vehicle status.

4. Battery Type

All remotes require a battery to function. The most common type is the CR2032 coin cell. These three-volt batteries are compact, inexpensive, and typically provide more than a year of service in one-way remotes and many months in two-way remotes. It’s a good idea to purchase an extra battery when you buy the remote so you’re prepared when it wears out.

Best Car Starter
The Prime 1WR3 one-button remote uses a CR2032 coin cell as a power source.

Many premium remotes have a built-in lithium-polymer or lithium-ion rechargeable battery. These remotes include a Micro-USB or USB-C port for charging. Under normal use, these two-way LCD units last three to five months between charges. Charging only takes a couple of hours and can be done from any powered USB port—even in your vehicle while driving. One tip: it’s best to limit the charge current to these cells. Using a 500 mA wall charger will maximize battery life.

Best Car Starter
The impressively durable Compustar T12 remote features up to 3 miles of range, an LCD screen, and a rechargeable battery.

5. Weather-Proof Designs

Some remotes, like Compustar’s flagship models, have a full IPX-7 waterproof rating. Basic remotes are typically water-resistant. If you’re prone to dropping your keys or leaving them in your pocket on laundry day, consider a waterproof solution.

Best Car Starter
The Pro T13 remote features an IPX-7 waterproof design and an industry-leading range of three miles.

6. Warranty

When shopping for a remote starter, it’s essential to understand the warranty coverage offered by your retailer and the hardware manufacturer. In most cases, the brain or controller is backed by a lifetime warranty. Additionally, these components should be reprogrammable if you plan to use the hardware in another vehicle with a new harness.

Remotes typically come with a one-year warranty, but premium options, such as Compustar’s PRO Series, offer a three-year warranty for added peace of mind.

Finally, don’t forget to ask about the warranty on labor or workmanship. Many reputable shops provide a lifetime warranty on their installation work, ensuring your remote starter continues to function reliably for years to come.

7. Smartphone Control Options

Another option is a smartphone control solution such as Drone. Drone works with an app on your phone that communicates with a small transceiver in the vehicle via the local cellular network. The app allows you to lock, unlock, remote-start, and control auxiliary features, and confirm commands within seconds.

There is a small monthly charge for the cellular service. Retailers can explain available features and service plans, including vehicle tracking and geofencing.

Note: Because Drone and similar services rely on the internet and cellular networks, always carry a regular key fob as a backup in case these services go down. You don’t want to be locked out.

Best Car Starter
The Drone smartphone control system allows you to use your phone to send commands to your remote car starter.

Pick the Best Remote for Your Use Case

When shopping for a remote car starter, your Product Specialist should ask where you park your vehicle relative to where you’ll be when you want to remote start it. If you work in a large manufacturing plant, hospital, or warehouse, you’ll want a long-range remote. If you only start your car in the driveway, range is less critical.

The discussion should also cover features such as trunk/hatch/tailgate releases and power-sliding doors on minivans. Multi-function remotes are ideal for applications that require more than just locking, unlocking, and starting.

Giving your car or truck a few extra minutes to warm up not only makes your commute more comfortable but also allows the engine to operate with warmer coolant and oil, reducing friction and fuel consumption. A remote car starter also makes a great holiday gift—just make sure you pick the best remote for the recipient’s needs.

This article is written and produced by the team at www.BestCarAudio.com. Reproduction or use of any kind is prohibited without the express written permission of 1sixty8 media.

Filed Under: ARTICLES, PRODUCTS, Remote Car Starters, RESOURCE LIBRARY

Vehicle Security Systems Explained

Vehicle SecurityWee-ooh, wee-ooh, honk, honk, honk, beep, beep, beep … Ah, the sweet melody of the modern car alarm. Vehicle security is big business. If you are worried about someone stealing your vehicle, visit your local mobile enhancement retailer and ask about a properly designed and installed vehicle security system. Before you head out the door, let’s take a look at the options for security systems and sensors, and talk about the importance of proper installation to ensure your car remains where you left it.

The Classic Car Alarm

Vehicle SecurityIn most cases, a handheld remote control, also known as a key fob, will control your car alarm. These remotes use radio frequency signals to communicate with the control module in the vehicle. When you want to arm the alarm, press the Lock button on the remote and the system will respond almost instantly.

Remotes are available in many different styles. The simplest include a single button that toggles arming and disarming functions. A slightly more-elaborate remote may include dedicated locking, unlocking, trunk release and auxiliary output buttons. Many alarms are integrated with a remote car starter or vice versa. In these systems, one of the buttons on the remote is typically dedicated to starting the vehicle.

The Purpose of a Vehicle Security System

Quite simply, the purpose of an alarm is to monitor your vehicle for attempted theft or vandalism. When the system detects a trigger from a particular zone or sensor, it activates a loud siren. Depending on your vehicle, you can opt to have the horn honk and the parking lights flash when the alarm goes off.

That infamous blinking red or blue LED in your dash is an indication to would-be thieves that you have taken measures to protect your vehicle and belongings. The knowledge that there is an alarm in the vehicle may be an adequate deterrent that convinces a thief to move on to a different target.

Remote Car Starter Functions

We mentioned that security systems are a popular option for a remote car starter. Some manufacturers offer a separate remote starter, security and hybrid (remote starter and security) systems. Other companies have designed their remote starters to accept a siren and shock sensor as options. This modular approach allows you to upgrade the system at any time.

Zones of Protection

Modern security systems are capable of monitoring several zones or sensors simultaneously. For example, your alarm will be connected to your door’s pin wires. These same wires signal the dome light to turn on when a door is open. If the system detects a door is open, it will trigger the alarm instantly.

Many security systems include separate inputs for hood and trunk monitoring. Your installer may choose to use a pin switch on the hood or trunk, or a mercury switch. If your vehicle has factory monitoring for the hood or trunk, those connections are often compatible with an aftermarket security system.

Vehicle SecurityEvery car alarm includes some form of shock sensor to detect abrupt impacts to the vehicle. There are many different designs for shock sensors. Some shock sensors work by suspending a small metal bead beside an inductor on a spring or rubber strap. Both allow the bead to move independently of the sensor housing. When the bead moves due to a shock or vibration, it induces a current in the inductor. The included circuitry determines the amplitude of the motion and decides if it should trigger the alarm.

Another method of monitoring shock and vibration is a digital accelerometer. The accelerometer communicates with the microcomputer in the shock sensor to provide information about vehicle movement. A benefit of this type of sensor is that it is almost impervious to changes in temperature. Most automotive-grade accelerometers function reliably from -40 to over 220 degrees with no noticeable change in accuracy.

Most security systems provide two levels of notification based on the signal from the shock sensor. A gentle tap on the vehicle will produce a warning that the vehicle is protected by a security system. This warning is usually in the form of a sequence of short chirps from the siren. The intent is for thieves to move on to a vehicle without extra protection. Of course, a sharp impact will trigger the alarm right away.

Optional Security Sensors

Many sensors are available to enhance the performance and coverage capabilities of a car alarm. Tilt-and-motion sensors can detect subtle changes in the angle of the vehicle to trigger the alarm. These are a great option if you want to protect a nice set of wheels or are worried about someone jacking up the vehicle to steal your catalytic converter.

Vehicle SecurityGlass-breakage sensors include a microphone and signal processing that is tuned to listen for the sound of a hard object hitting the glass. A firm tap with a key or coin is often enough to trigger these sensors.

Radar or field disturbance sensors are another popular option. These devices set up a radio-frequency field around the sensor. When an object moves into or out of the field, the alarm will trigger. These sensors are ideal for convertible vehicles and Jeeps where the interior is accessible without setting off a shock or motion sensor. The size of the field is adjustable, so your installer can work with you to decide the appropriate amount of coverage. Keep in mind that false alarms are very annoying.

Convenience Features

The most-popular convenience feature is door lock control. This feature is standard on almost all alarm systems. When you arm the alarm, the doors lock. Not surprisingly, the doors unlock when you disarm the alarm. Remote trunk release is another popular convenience feature. Most security systems have a dedicated trunk release output that automatically disables the shock sensor or disarms the alarm just before the trunk or hatch opens. If you don’t have a power trunk release, a solenoid can be added to most vehicles to mimic the function of the key.

Power window, sunroof and power sliding door control are also options. A great example of power window control would be to roll the windows up as soon as the system is armed. If you have a van with a power tailgate or a car with a motorized trunk, controlling it remotely is also a possibility.

The Importance of Proper Installation

Vehicle Security
Mobile Edge shows us what a securely hidden, expertly wired alarm brain looks like.

Just as with the installation of a remote starter, how a car alarm is integrated into your vehicle can have a dramatic effect on its performance and reliability.

Many new vehicles use computerized data networks to control and monitor functions. Door lock control, door and hood status (open or closed), factory alarm system control, and even horn activation are all done digitally through a vehicle integration module. These modules need to be configured by your installer for the specific make, model, year and trim level of your vehicle before installation.

Any electrical connections required to install your alarm have to be planned and executed carefully. An installer who would simply cut the starter wire under the dash and install a starter-cut relay has effectively labeled one of the connections a thief would need to hotwire a car. Hot-wiring a vehicle is nearly impossible on modern vehicles because most keys include a factory-installed security or immobilizer system. With that said, the placement of modules, sensors and relays shouldn’t attract attention to themselves. If they aren’t concealed properly, a thief has a much easier time bypassing your security system.

All wiring should be neat and tidy. All connections should be both mechanically secure and electrically conductive. Using harness wrapping materials like cloth tape, vinyl tape or split loom tubing that matches the factory wiring is a great way for your installer to conceal the security system.

Factory Security Systems

If you are looking at a new-car brochure, you will see that the wording chosen to describe the factory “alarm” has been picked very judiciously. Let’s look at a few examples. The Ford Focus includes a “Passive Anti-Theft Engine Immobilizer System,” the Honda Civic has an “Immobilizer Theft Deterrent System” and, finally, the Toyota Camry has an “Anti-theft System with Alarm.” The Camry brochure goes on to describe how the system works: “When you insert your key into the ignition switch or bring a Smart Key fob into the vehicle, the key transmits an electronic code to the vehicle. The engine will only start if the code in the transponder chip inside the key/fob matches the code in the vehicle’s immobilizer.”

Sounds pretty good, doesn’t it? Sadly, it isn’t hard to duplicate the code from those transponder chips. After all, if you lose your key or fob, there has to be a way to replace it. The hardware to clone a key can be acquired for around $100. You will also note that there is no mention of damage prevention or protection. Very few, if any, factory security systems include a shock sensor.

If your aftermarket security system includes a starter disable system, even with the factory key or fob, the vehicle will not start without disarming the alarm.

Preventing Vehicle Theft

Vehicle SecurityThe cold, hard fact is that anyone with a flatbed can pull up in front of your vehicle, throw a hook around the frame and drag it onto the flatbed. In a minute, even with an alarm sounding, your car could be gone. An important aspect of ensuring your vehicle is safe is communication. If you know someone is tampering with your vehicle, you can look out the window to see what’s going on and call the police, if necessary. (Please don’t run out the door yelling and screaming – you don’t know if they have any weapons.)

Remote key fobs that can receive signals from the vehicle are a great option. When your alarm triggers, your key fob will vibrate and buzz to let you know something is going on.

The next level of communication is a two-way cellular communication device. If your alarm triggers, your smartphone will notify you almost instantly. With cellular communication, there are no limits to the distance between you and your vehicle – you will always get alerts when something happens. These telematics systems also include the ability to lock and unlock the vehicle from the application on your phone.

Protect Your Vehicle

We could go on for days talking about the intricacies and details of automotive security systems. If you are concerned about vandalism or theft, visit your local mobile enhancement retailer to talk about adding an alarm system to your vehicle. They can suggest a solution that provides the coverage and features you want to keep your pride and joy safe and secure.

This article is written and produced by the team at www.BestCarAudio.com. Reproduction or use of any kind is prohibited without the express written permission of 1sixty8 media.

Filed Under: Vehicle Security

“But the Box Power Ratings Say This Subwoofer Will Handle 1,000 Watts!”

Power RatingsThere is no car audio topic more confusing and inconsistent than speaker power ratings. The fact is, the methods developed to test speakers are quite simple and reliable. If the speaker passes the test, print the number.

A long time ago, some unknown manufacturer felt it was important to tell consumers that their speaker would handle more power than a competitor’s product. We are talking about the Lear Jet, Jensen and Muntz days, not five or 10 years ago. Whoever that company was, printed a bigger number on their packaging and told their customers that their speaker was better because of it. Of course, competitors followed suit and countered this slightly bogus claim with an even more ridiculous rating. On and on this goes. We currently have 6×9 speakers that claim to handle 600 watts but have a tiny little 1-inch voice coil. The math simply doesn’t add up.

In this article, we are going to talk about speaker power ratings. We’ll explain what the ratings mean and how they are tested. When you are done reading this article, you’ll never look at a bogus MAXIMUM POWER specification the same way.

What is Power?

Power RatingsPower is a unit of energy that describes how much work is done over a specific period. We car guys know about horsepower and torque, and since you are reading this, you clearly have an interest in audio systems and have heard of the electrical unit of power known as the watt. By definition, 1 watt of power is equivalent to 1 joule of energy delivered over a period of one second. In terms you may be more familiar with, that’s equivalent to the work done in a circuit powered by 1 volt where 1 amp of current is flowing through the load. Exciting, isn’t it?

In our speakers, the power from our amplifier flows through the voice coil. The flow of electrons through the coil creates a magnetic field around the coil. Depending on the polarity (direction) of the current flow, the magnetic field may cause the coil and the attached cone to move forward or backward in the basket. As the signal coming out of our amplifier is alternating current, the speaker responds by moving back and forth with the changes in polarity.

What Happens When We Have Too Much Power?

Power RatingsThe electrical power from our amplifier is no different from the electricity that flows through an electric heating element on a stovetop. The heating element has a resistance, usually between 27 and 40 ohms. As we apply the 120v electrical signal from the wall to this coil of wire, work is done. For a 27 ohm coil, fed with 120 volts of electricity, 533 watts of work is produced. This “work” is the generation of heat.

When we send 100 watts of power to a speaker, almost all of that energy is converted to heat. Maybe 2 or 3 percent of that energy from the amp is converted to sound energy. Hopefully, you can see where this is going. When current flows through the voice coil, it gets hot. More current produces more heat. Eventually, the glue that holds the voice coil winding to the former starts to overheat and fail. At this point, the voice coil winding will likely unravel and usually gets jammed in the magnet gap, causing the speaker to stop playing.

As an aside, we could get into an entire discussion about power handling problems caused by excessive cone travel. For the purposes of this article, let’s assume we are operating the speaker within a frequency range where cone excursion is not an issue. We’ll talk about speaker excursion another time.

The Reference for Power Ratings

The current reference for testing automotive loudspeakers is the CEA-2031 standard. This set of test criteria include how and where the speaker under test is mounted and the content of the signal used to test the speaker. It is this audio signal, and how it is used, that is of interest to this article.

The power handling test track is a modified pink noise signal that is bandwidth limited between 40Hz and 10 kHz. The high-frequency content of the signal simulates the spectral content of a distorted bass or midrange signal. That’s right: If you distort a low-frequency signal, it creates harmonics. As such, you will send lots of extra midrange and high-frequency information to your speaker if the amp is clipping.

The CEA-2031 signal is recorded with very specific amplitude specifications. The test track is prefaced by a reference-level sound recording. In order to quantify the power level of the test, the reference signal is played and the amplitude is measured. On the engineering side, power tests are taken at RMS voltage levels. That voltage is converted to watts, based on the minimum impedance of the driver under test. For example, efficiency measurements are taken using voltages of 2 or 2.83 volts, which translate to 1 or 2 watts respectively on a 4-ohm speaker.

How They Test Power Handling

Power RatingsOnce the reference level is set, the test tone is played without making adjustments to the playback amplitude. The test track is designed to provide two simultaneous tests. The RMS voltage level of the track tests the speaker’s continuous power handling capabilities. The peak amplitude of the signal simultaneously tests the peak power handling of the speaker with an additional 3dB of input power.

The device under test (speaker) is placed in a jig in a room with controlled environmental conditions. “The loudspeaker is rated for the power that it can withstand for 2 hours without a permanent change in acoustical, mechanical or electrical characteristics greater than 10%,” according to the specification. To achieve a higher rating, the test is to be repeated at a higher power level for the same time after a two-hour cool-down period.

Many companies test their products for longer. A lot of Japanese companies test their speakers for eight to 10 hours. Some premium speaker companies test their speakers for an awe-inspiring 100 hours. That’s right – more than four days playing this modified pink noise track.

There are variations of this test. For subwoofers, mounting the drivers in a sealed enclosure will increase the difficulty of the test dramatically. The air inside the enclosure will get hot and reduce the ability for the subwoofer to cool itself.

Where Do the Big Numbers Come From?

So, how can the marketing guys sleep at night with their insane power rating claims? We mentioned that physical power handling could be a concern. Of course, playing bass into a tweeter is going to result in disaster, quickly. Would playing a single tone for a period of time determine a power handling rating? What if a speaker can handle a 500 Hz tone for a few hours? Is that a power rating? Most certainly. Does it accurately describe the capabilities of the speaker? Not really.

Choosing Speakers for Your Vehicle

Power RatingsSo, now that you know how speaker power ratings are created, you can basically ignore them. The process of choosing a speaker should be based on performance, not specifications. Frequency response, efficiency and distortion performance separate good from run-of-the-mill. A speaker rated for 150 watts is not necessarily better than a speaker rated at 125 watts.

If you are buying subwoofers, power handling specs become a little more important. You won’t want to pair up a subwoofer rated for 200 watts to a 1,000-watt amplifier. If you want to keep things safe, match the subwoofer power rating to the amp rating. If you want to guarantee you’ll never blow the sub, buy a speaker that is rated for twice as much power as your amp.

Your local mobile enhancement retailer can help you design an audio system upgrade that sounds amazing, will play at the volumes you want and will last for years.

This article is written and produced by the team at www.BestCarAudio.com. Reproduction or use of any kind is prohibited without the express written permission of 1sixty8 media.

Filed Under: ARTICLES, Car Audio, RESOURCE LIBRARY

  • « Previous Page
  • 1
  • 2
  • 3
  • 4
  • 5
  • …
  • 35
  • Next Page »

Recent Articles

Hertz VENEZIA V8 DSPx²

Product Spotlight: Hertz VENEZIA V8 DSPx²

March 30, 2026 

The Hertz VENEZIA V8 DSPx² is a marine-grade amplifier with a built-in digital signal processor (DSP) designed to power and tune an entire audio system from a single compact, … [Read More...]

A woman with glasses looking down at a cellphone in her hand while in the background, there is a vehicle with its hood open

Avoid Costly Car Audio Installation Mistakes with Certified Professionals

March 23, 2026 

Upgrading your vehicle with aftermarket electronics and accessories can improve comfort, convenience, and performance. From advanced audio systems to safety cameras and … [Read More...]

The MECP logo on the wall of a garage with a cool futuristic car being worked on

Upgrade With Confidence Using Certified Professionals

March 9, 2026 

Upgrading your vehicle is an exciting way to improve comfort, entertainment, safety, and overall driving enjoyment. Whether you are adding a premium sound system, cutting-edge … [Read More...]

A car audio amplifier

Are Classic Car Audio Amplifiers Better?

March 1, 2026 

If you’ve been in the audio industry for a while, then you’ve likely heard that old-school or classic car audio amplifiers are better than the new stuff. How someone quantifies … [Read More...]

Testimonials

Very Friendly Staff

Very friendly staff, knowledgeable group . Needed help on my remote starter, they got me back up and running in no time . They also do amazing tint jobs!!

I recommend then to everyone!

Super great place to get lots of custom things done. Very nice, very knowledgeable and very fare prices. I recommend to everyone I know.

Will be going back for sure!

Very happy with how the tint came out. Professional and friendly. Will be going back for sure.

Subscribe to Our Website

Enter your email address to subscribe to our website and receive notifications of new posts by email.

Location

55 Woodmont Road, Milford, CT 06460

Get Directions to Speed of Sound Technologies

Connect With Us

  • Facebook
  • Instagram

Services

  • Car Audio
  • Custom Installation
  • Driver Safety
  • Radar/Laser Detectors
  • Remote Starters
  • Truck Accessories
  • Vehicle Security
  • Window Tint

Hours

Monday, Tuesday, Wednesday, Thursday, Friday9:00 am – 6:00 pm
Saturday9:00 am – 5:00 pm

Closed
Sunday

Copyright © 2026 Speed of Sound Technologies · Privacy Policy · Website by 1sixty8 media, inc. · Log in


Loading Comments...