Speed of Sound Technologies

Mobile Enhancement Experts in Milford CT

55 Woodmont Rd., Milford, CT 203-954-0066
  • Home
  • About Us
  • Services
    • Car Audio
    • Custom Installation
    • Driver Safety
    • Radar/Laser Detectors
    • Remote Starters
    • Truck Accessories
    • Vehicle Security
    • Window Tint
  • Location and Directions
  • Contact Us
  • Facebook
  • Instagram

Installing an Amplifier Is More Complicated Than Just Hooking Up Wires

Hooking Up Wires
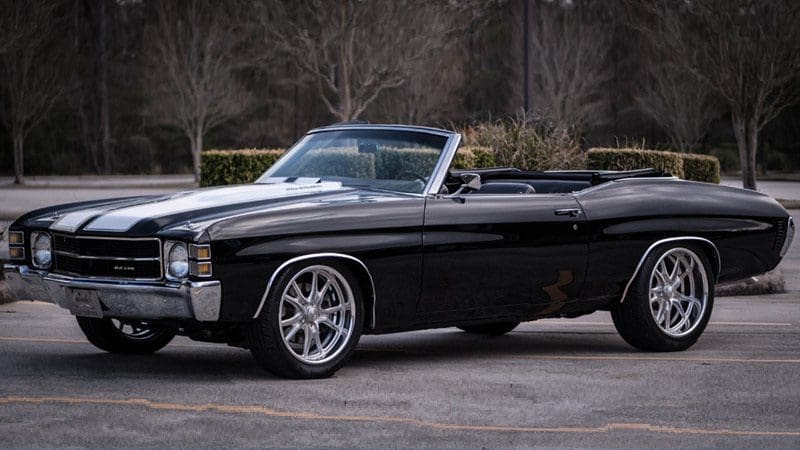
If you look around the Internet, it won’t take long before you see someone say that hooking up an amplifier is as easy as connecting a few wires. Are they right? Well, yes. You most certainly do need to hook up some wires. You also need to know how to connect those wires, disassemble your vehicle, run the wires safely and reassemble the vehicle. Oh, did they mention that only covers the power wire? You still need a ground wire, signal cables, speaker wires and a remote wire. No problem, right? You can figure this stuff out, it’s just hooking up wires! You have access to YouTube, Facebook and your friend whose dad is an electrician.

Most people don’t have everything they need to set up an amp accurately. Do you have the equipment to test the audio signal you are feeding to the amp to ensure it doesn’t distort? Do you have the tools to ensure the amp can handle the signal input voltage you’ll be delivering? Do you know how to set the sensitivity control and the crossovers?

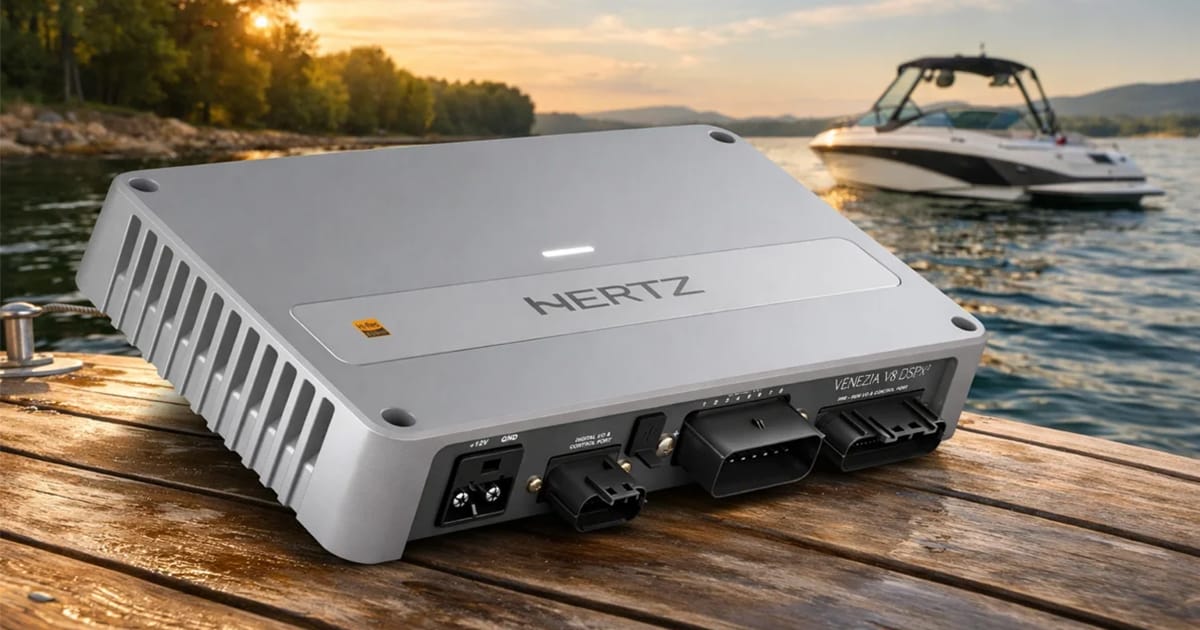
Suddenly, hooking up a few wires has blossomed into a full-on engineering project that requires a multimeter, an oscilloscope and a real-time analyzer. Let’s look at what it takes to install a simple five-channel amp in a new car. We think you’ll be surprised.

Step 1: Power Delivery

Hooking Up Wires
The ground connection is as important as the power wire connection.

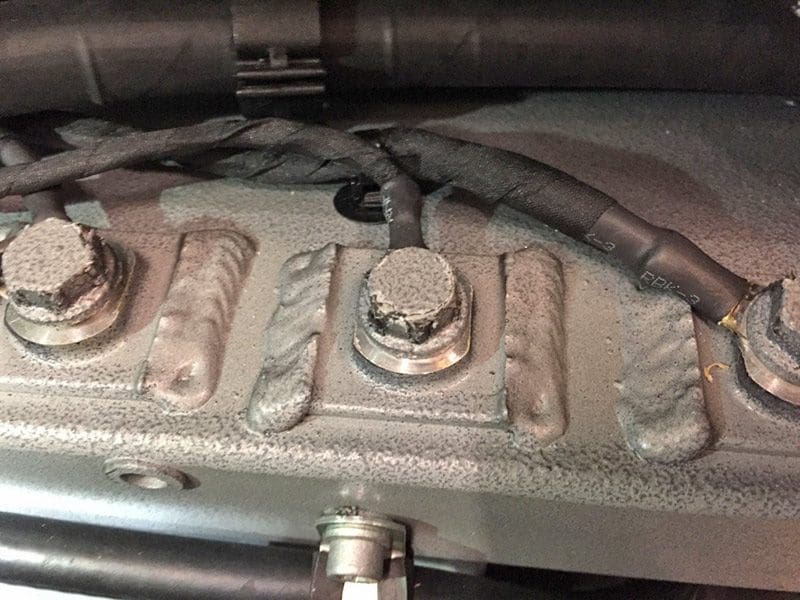
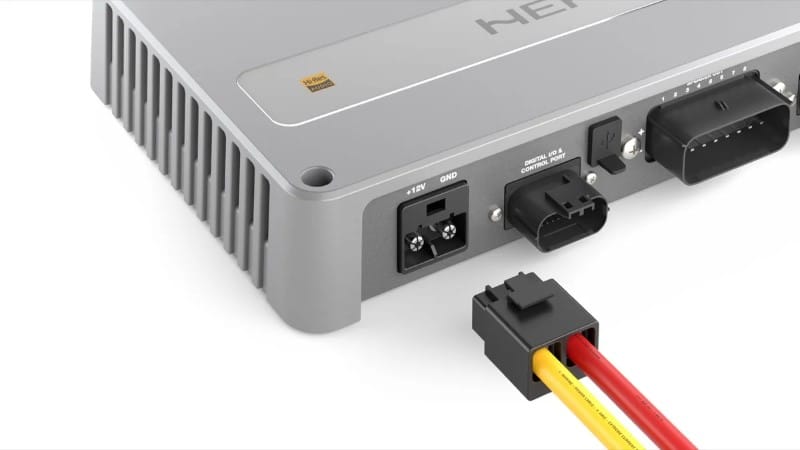
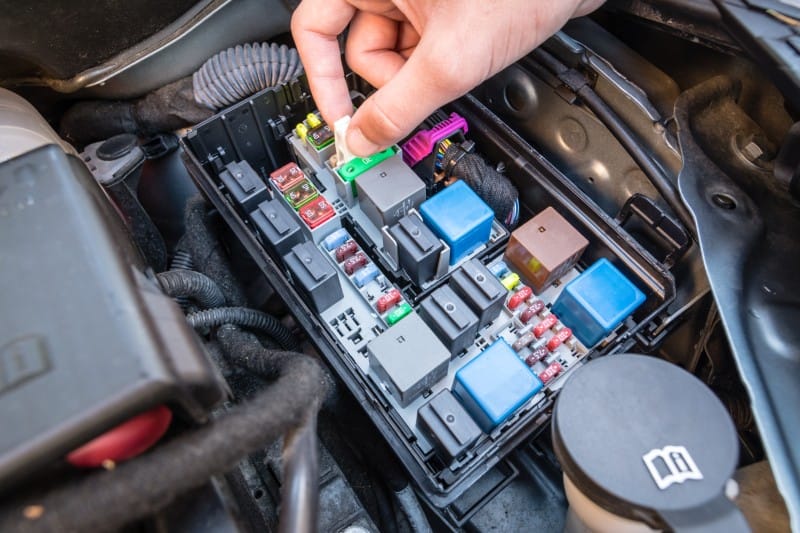
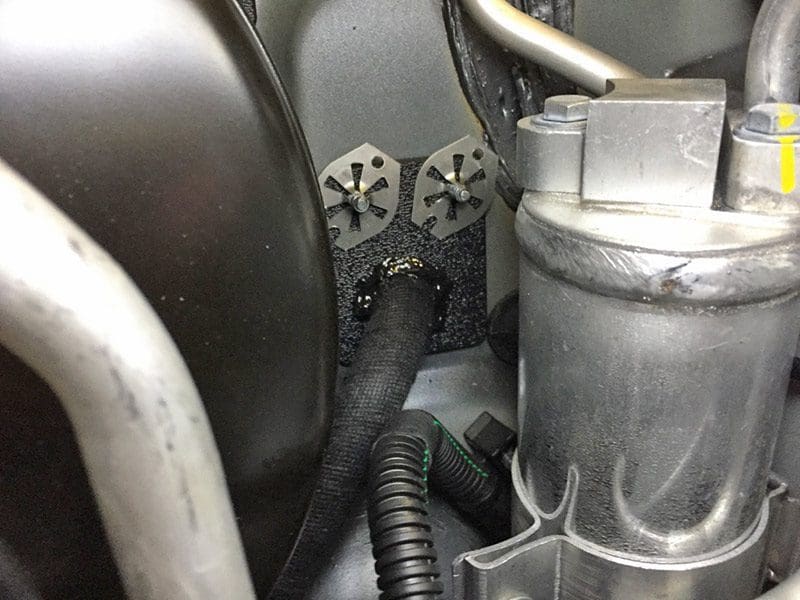
The task is simple: Provide your new amplifier with an appropriate connection to the vehicle electrical system. The connection requires adequately sized conductors for minimal voltage drop at the rated current requirements of the amplifier. If you’re on a budget, you will need to know how to de-rate the power wire if it’s not pure copper. The installation needs a protection device to guard against short circuits in the event of an accident or mishap with the amplifier. The ground return path needs to offer minimal resistance in order to prevent ground loops in the system.

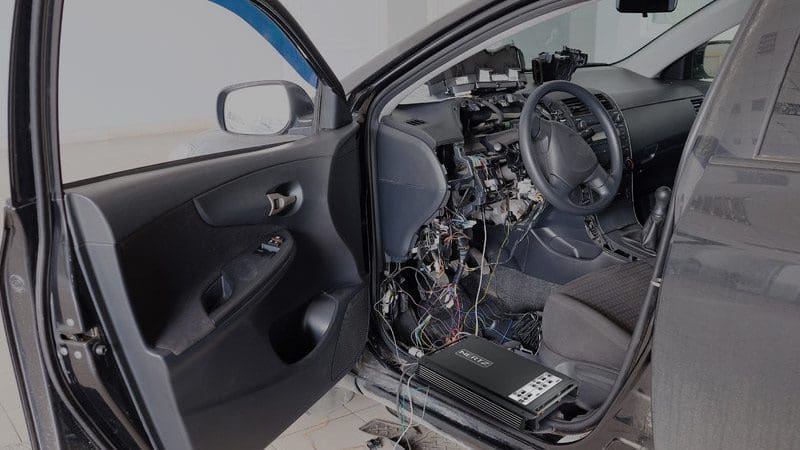
To complete this task, you will need to find a path from the vehicle battery to the amplifier. The path must be away from any moving components or sources of heat. You’ll also need to avoid sources of electrical interference, if possible.

You will need to know how to identify vehicles constructed using aluminum, composites or laminated materials and how to compensate for this. You will need to recognize where vehicles are assembled using adhesives instead of spot welds and how to compensate for that.

Choosing a reliable and appropriate protection device is also crucial. You want something that can withstand exposure to the elements while maintaining adequate protection and minimal voltage loss. You need to know where and how to mount the device so that the vehicle is protected properly.

Hooking Up Wires
When passing through metal the wire should be protected and sealed.

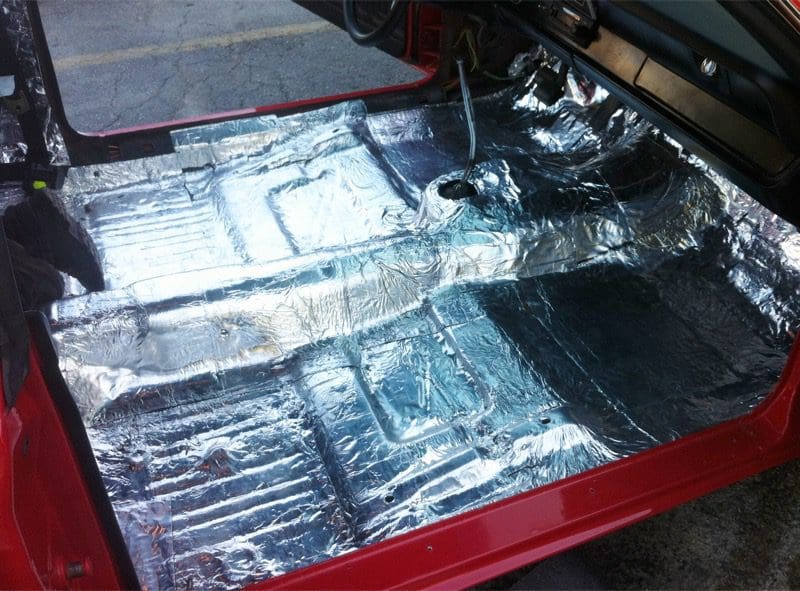
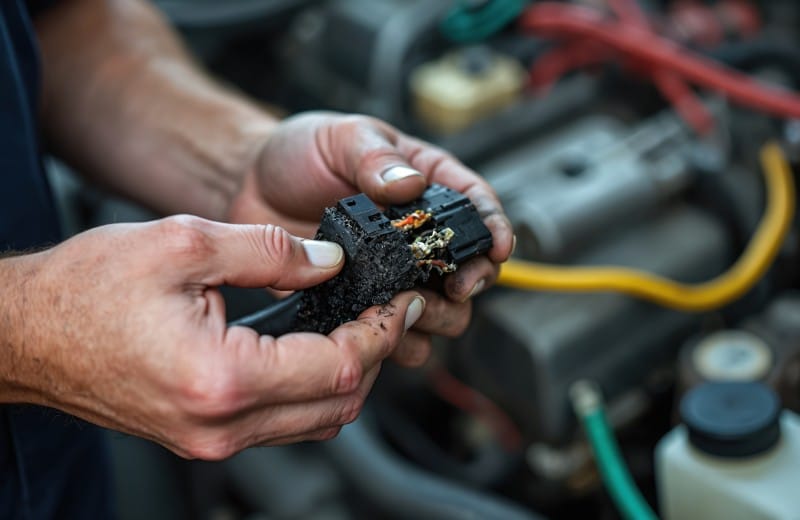
If you have to drill holes for anything, make sure you know how to check for factory wiring harnesses, fuel lines, brake lines and emission control components. You’ll need something to treat the metal after you have drilled it so that it won’t rust. You will need to protect the wires you run through the hole. If you have completed all the tests to confirm that you can use the chassis as your ground return path, the same precautions apply to drilling that hole. You need to prepare the vehicle for the ground connection, and have a plan to treat it after installation to prevent corrosion. Of course, you need the appropriate hardware to fasten the ground connection or connections properly, safely and securely.

Finally, you will need to have the proper tools to make your connection to the amplifier. These tools may be a simple as a sharp knife, or may include the need for a terminal crimping tool capable of handling appropriate-sized spade or ring terminals. Depending on the amplifier, you may need wire ferrules for a secure, efficient and reliable installation. You’ll also need a screwdriver and a set of Allen keys.

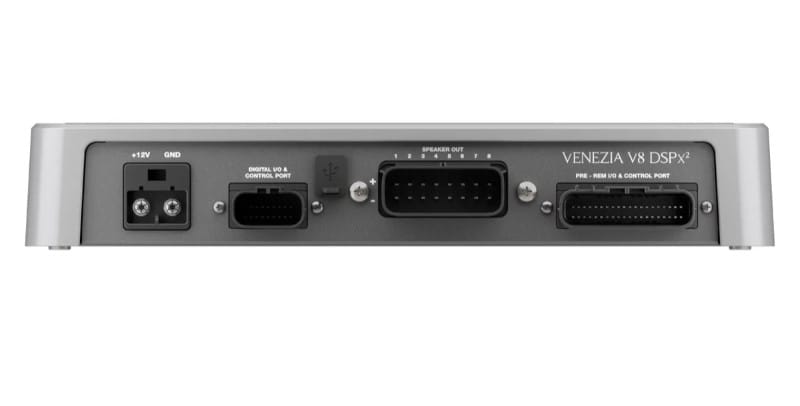
Step 2A: Signal Delivery – Aftermarket Radio

Hooking Up Wires
Good quality RCA interconnects are an important part of amplifier installation.

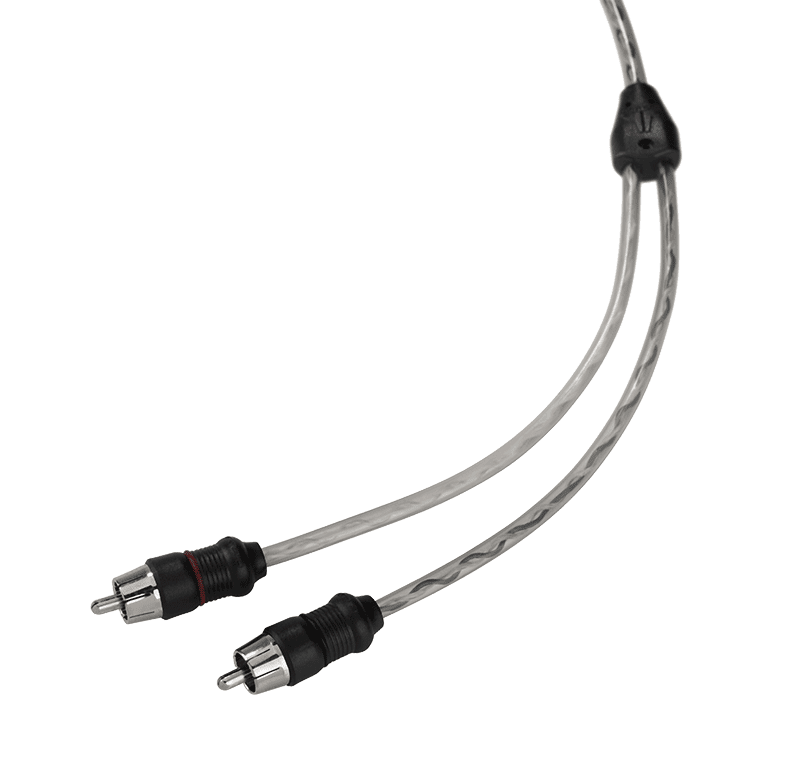
If you have chosen to replace the stock radio in your vehicle with an aftermarket unit, connecting the amp to the source unit is as simple running RCA interconnect cables. Isn’t it? First and foremost, you will need to know what length of cable you need. The cables certainly can’t be too short, and if they are too long, how will you deal with the extra length? The choice of cables is also quite important. Are the inputs to your amplifier single-ended or differential? If you don’t know, do you have the tools to test the amp? Based on the answer to the amplifier input stage design research, have you chosen the correct style of interconnect for your application? Your choices include twisted pair cables and coaxial cables, each of which have many options for shielding.

In terms of running the interconnect cables through your vehicle, do you know how to disassemble the vehicle adequately to run the cables safely and securely? If the cables are visible when you deem the installation complete, well, it isn’t. Do you know what devices and areas to avoid while running the cable? Do you have the supplies to secure the cables in place to prevent them from buzzing and rattling in the dash as you drive?

Step 2B: Factory-Installed Source Unit

Hooking Up Wires
Soldering is the preferred method of integrating with factory wiring.

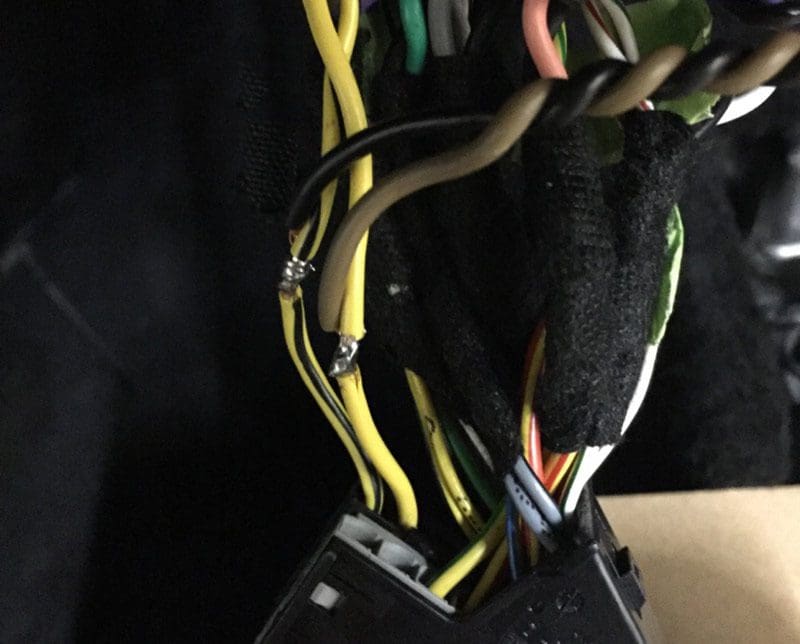
If you will be using the factory source unit to feed your amplifier, you need to know what wires to hook up. If you are lucky, someone may have worked on a car like yours and hopefully wrote down which wire goes where. If nobody has provided the answers, you’ll need some tools to do some research.

First, you need to find the audio signal coming out of the factory source unit. In some cases, there is no analog audio signal present at the source, only out of the factory amplifier. Then you’ll need to determine the polarity of the signal. Next, you’ll need tools to determine the frequency response and amplitude of this signal. You will also need to be able to discern whether the signal is usable all the way up to full volume on the head unit. Finally, you’ll need to determine what kind of signal you are dealing with. Is it balanced or single-ended? Does the frequency response change with different volume settings? Does the signal contain the audio information you need, or is there an upmixer in the vehicle? Other tests include checking for phase equalization in the signal and the presence of warnings and alerts from the vehicle safety systems.

Depending on the answers you get, you will need to determine how to proceed. Can you connect the RCA interconnects directly to the speaker wire? Do you need a line-level converter? Do you need something to remove equalization and time alignment from the signal? Do you know how to deal with phase EQ? Hopefully you can get this right, or your upgrade may not sound very good.

Step 3: Running Speaker Wires

Hooking Up Wires
Ferrules can be used to help eliminate stray wires.

OK, now that we have done all of our testing and made sure we have a usable signal for our amp, it’s time to run wires to the speakers. If you are using the factory speakers, you can use the factory wiring to save some time. Just follow the rules about where and how to run speaker wires relative to noise sources, sharp edges, moving objects, heat sources and so on.

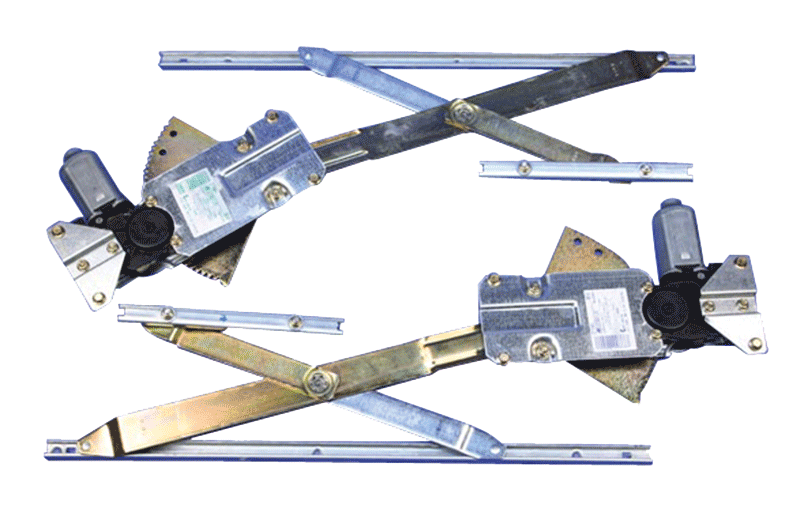
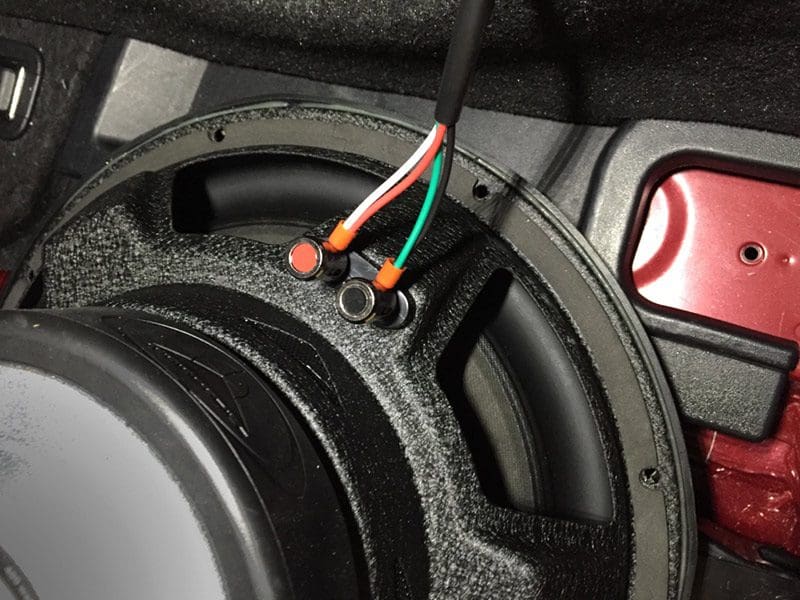
If you are running new speaker wire in the doors, you need to know how to take the trim off the door without damaging it or losing any of the clips. You will have to remove the door handle and lock release cables from the door panel. In some vehicles, the window regulator needs to come out so that you can access the inside of the wire boot.

Speaking of wire boots, most include a connector of some kind on the vehicle side, so you will need to know how to deal with those, and how to safely and securely add a quick-disconnect to the wire to make sure the door remains serviceable.

After you have the wire in the door, you will need to connect to the speakers. This could be as simple as crimping on spade terminals, using a terminal block or soldering to a factory wire plug. It’s always good to check the wiring to verify that you have the polarity correct before you put the door back together. Oh, and make sure you use appropriate wire management so that the new speaker wire doesn’t interfere with the window mechanism.

Step 4: Amplifier Configuration

Hooking Up Wires
There are a number of controls that must be properly set on amplifiers.

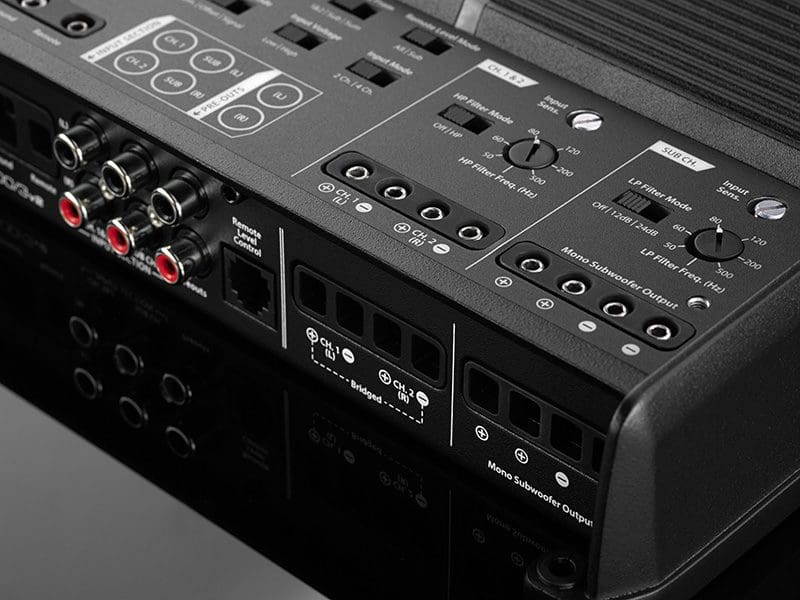
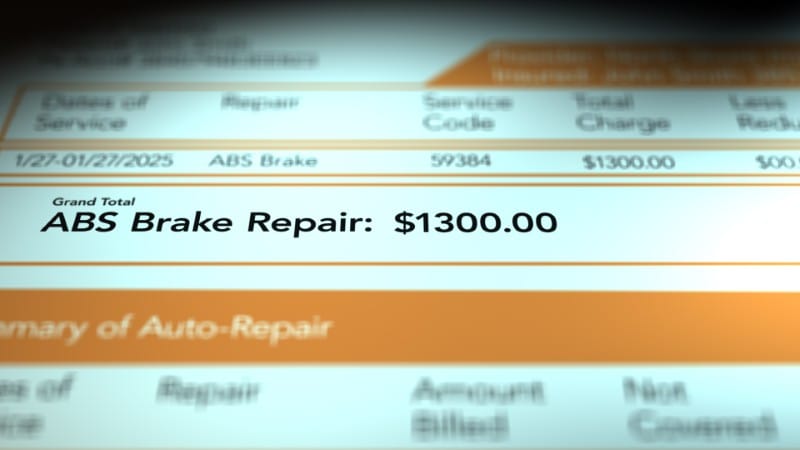
Congratulations! If you have made it this far, then it’s clear sailing to the finish line. You will have determined that the audio signal you are connecting to the amplifier will work within its specifications for voltage and signal type (balanced or not). The next step is to configure the crossovers on the amplifier. In most cases, you will be applying a high-pass filter to the front and rear speakers and a low-pass filter to the subwoofer on the mono channel. We all know that the crossover frequency labels on amplifiers are notoriously inaccurate, so you may need an RTA to measure the frequency response of the system as you fine-tune the crossovers. You’ll need to know how low to set the crossovers so that you can establish a solid bass foundation in the front of the vehicle while protecting the speakers from excessive excursion. Next, you need to blend the subwoofer crossover with the front and rear speakers so that there are no gaps or significant overlaps in frequency response. If there are any phase issues with the midrange speakers blending with the subwoofer, you need to know how to compensate for that.

The last step is to set the sensitivity control on your amplifier to ensure that you have maximized the signal-to-noise ratio of your audio system and ensured that it will not distort significantly at full volume. It should also be noted that a lot of factory source units distort at full volume, so your tests in section 2B will determine what the new “full volume” setting on your deck is. Being able to distort the signal a little bit is OK, as it allows you to play music that was recorded quietly at enjoyable levels. It’s also necessary to know how much gain overlap is appropriate for the subwoofer and midrange speakers.

Step 5: Testing the Installation

Hooking Up WiresOnce the installation and configuration are complete, the system needs to be tested. The person doing the work will need a reference against which he or she can judge the performance of the upgrade. We aren’t quite sure what to tell you about this. You either have a reference for a great sounding audio system, or you don’t. If there is something wrong, the installer will need to resolve the issue. Potential problems include engine noise, heterodyne noise and radio reception issues from an installation standpoint. You also need to know how to check the system to verify that all the speakers are in correct polarity and the signals from each are summing at the listening position.

Congratulations on Your Amplifier Installation

Well, there you go. That’s a short list of things you need to know in order to install, test and troubleshoot the wiring up of your new amplifier. We didn’t talk about guidelines for amplifier mounting locations or mounting methods, since those topics vary a great deal based on amplifier choice, vehicle design and the chosen style of installation.

If you decide that you don’t have the tools to complete any one of these tasks, your local mobile enhancement retailer is willing to help you out with your installation. Give them a call!

This article is written and produced by the team at www.BestCarAudio.com. Reproduction or use of any kind is prohibited without the express written permission of 1sixty8 media.

Filed Under: ARTICLES, Car Audio, RESOURCE LIBRARY

MECP Certification Types: Technician vs Specialist for Vehicle Upgrades

MECP Certification

When owners upgrade cars, trucks, or SUVs with aftermarket technology, professionals must know vehicle systems inside and out. Modern vehicles use complex electronics, data networks, and safety features. Installing aftermarket electronics calls for an extensive understanding of how these systems work together.

The Mobile Electronics Certified Professional (MECP) program is widely recognized as a measure of technician knowledge and competency. MECP certifications show that a professional understands the skills needed to safely install automotive electronics. Information about the program and its certification structure can be found at the MECP website, and examples of available certification courses are listed in the Learning Portal.

Within the MECP program, along with the broader automotive service industry, certifications typically fall into two categories: Technician certifications and Specialist certifications. Both represent valuable expertise, but they reflect different types of professional knowledge.

Technician Certifications Provide Broad System Knowledge

Technician certifications are designed to validate a professional’s understanding of the full scope of aftermarket vehicle electronics installation. These certifications cover a wide range of technologies and procedures technicians encounter during vehicle upgrades.

MECP Technician certifications include Apprentice, Skilled, and Expert levels. They ensure understanding of electrical and mechanical fundamentals for skill development at increasing levels. These focus on installation, electrical architecture, wiring, integration with factory systems, and troubleshooting.

Professionals with Technician-level certification typically demonstrate knowledge of:
  • Vehicle electrical systems and circuit design
  • Proper grounding and wiring techniques
  • Electrical load calculations
  • Diagnostics and signal testing
  • Integration of aftermarket components with OEM systems

These broad certifications prepare professionals for many upgrades. Tasks such as audio installation, lighting, remote start, security, and infotainment involve similar electrical fundamentals. For vehicle owners, broad Technician certification means professionals can handle many aspects of upgrades, assuring systems work together reliably.

Specialist Certifications Focus on Deeper Expertise

Technician certifications cover broad installation knowledge, while Specialist certifications focus in depth on a single technology or installation type, offering advanced expertise and a detailed grasp within that specialty.

Examples of specialty areas in the aftermarket industry may include:
  • Advanced audio system design and tuning
  • High-level vehicle integration technologies
  • Complex security and remote start systems
  • Product technology expertise
  • Advanced OEM system identification and integration
  • Sales or product application specialization

Because Specialist certifications focus in depth on a specific technology, professionals who hold these credentials often develop advanced skills in system optimization, detailed configuration, and complex troubleshooting.

The Advantage of a Technician-Certified Professional

MECP CertificationA professional with a Technician certification offers one key benefit for vehicle owners: versatility, as their skills allow them to perform a diverse range of upgrades while retaining system safety and reliability.

Their education spans many procedures and technologies, enabling management of diverse upgrades at higher certification levels. They understand system interactions to install components without affecting factory electronics or safety features.

Technician-certified professionals are often responsible for:
  • Planning upgrade installations
  • Managing wiring and system integration
  • Diagnosing compatibility errors
  • Testing and verifying system performance

Industry data shows vehicles increasingly depend on electronics. Research reports modern vehicles contain over 100 electronic modules and miles of wiring. Electrical knowledge is essential. Professionals with technician knowledge are trained for these environments. This certification assures vehicle owners that the professional is qualified to install technologies correctly and reliably, increasing safety and performance.

The Advantage of a Specialist-Certified Professional

A Specialist certification proves deep expertise in a specific technology. Professionals who earn Specialist credentials gain deep knowledge of specific systems, rendering them valuable for technically demanding upgrades.
Specialist-certified professionals often bring strengths such as:
  • Advanced knowledge of specific product technologies
  • In-depth understanding of system tuning or optimization
  • Experience solving complex problems within a single technology category
  • Detailed knowledge of advanced features and integration methods

Specialization is gaining value in the automotive service industry. Labor studies show that advanced specialists often earn higher wages and are in greater demand. Their expertise helps solve highly technical problems that need deeper knowledge. Owners aiming for advanced upgrades such as high-performance audio or complex integrations benefit from specialist knowledge for the best results.

Why Both Certifications Matter in the Automotive Aftermarket

MECP CertificationModern vehicles are sophisticated electronic platforms. Aftermarket upgrades must integrate with data networks, safety, and factory systems without causing issues. This complexity makes both technician and specialist expertise valuable in the automotive aftermarket. Professionals that have been verified with both types, or several Specialist certifications, can more effectively guide upgrades and diagnostics than those without certification.

Technician-certified professionals offer broad installation skills and a strong understanding of in-vehicle systems. Specialist-certified professionals provide deep insight into certain technologies. Successful installation shops commonly employ both, combining electrical expertise and specialized knowledge as needed.

What Certification Means for Vehicle Owners

Certification programs like MECP help establish professional standards within the automotive aftermarket industry. Certified professionals have demonstrated knowledge of installation practices, safety procedures, and modern vehicle electronics.

Vehicle owners gain confidence when choosing a Technician or Specialist certified professional with verified expertise. Technician certifications confirm broad upgrade ability and system understanding. Specialist certifications show advanced expertise in specific technologies. Together, both assure owners of safe, reliable, and performance-focused upgrades that conform to industry standards.

This article is written and produced by the team at www.BestCarAudio.com. Reproduction or use of any kind is prohibited without the express written permission of 1sixty8 media.

Filed Under: ARTICLES, Car Audio, PRODUCTS, RESOURCE LIBRARY Tagged With: MECP

Upgrading Your Classic Car Technology For Safety and Convenience

Classic Car TechnologyWhile modern vehicle features such as lane departure warning systems and adaptive cruise control aren’t available for your classic car or hot rod, there are modern technologies available for your pride and joy. These will make your next cruise or car show much safer and more enjoyable. Let’s take a look at how classic car technology improvements can benefit your classic car without making it look like a spaceship or Knight Rider.

Backup and Parking Camera Systems

Classic Car TechnologyMost new cars come with a backup camera. These camera systems display an image of what is behind your vehicle as soon as the transmission is in reverse gear. If your vehicle has limited rearward visibility, a camera system can prevent accidents and damage with a minimal investment.

These compact cameras are available in flush-mount, surface mount and license plate mount solutions. The cameras are quite small and are available in black and chrome finishes. Integrating a camera into your classic vehicle isn’t hard. More importantly, they do not require any permanent modification to your ride.

Classic Car TechnologyA camera system requires a monitor of some kind. If you have chosen an aftermarket radio solution with a color LCD screen, displaying the camera image is very easy. If the interior of your classic vehicle looks like it just rolled off the factory floor, a qualified mobile enhancement retailer can work with you to develop a custom monitor solution. Perhaps the most common option in these applications is a new rearview mirror with an integrated screen. With a little work, one of these mirrors can be incorporated into a solution that looks like your factory mirror.

Forward Facing Camera and Parking Sensor Solutions

Classic Car TechnologyJust as with the backup cameras, mobile enhancement retailers can incorporate a forward-facing camera into the front of your vehicle. These cameras are perfect for avoiding parking curbs and getting nice and close the garage wall at home. Integrating the secondary forward-facing camera into a backup camera system is easy.

Another option is a parking sensor system. Solutions like the Curb Alert Pro can prevent scratches to your bumper or air dam by alerting you when you are getting close to the curb. This system uses a compact sensor that mounts low on your vehicle. As you approach an object, the system emits a series of beeps to let you know you are getting close to it. The speed of the beeps increases as you get closer and closer.

Vehicle Convenience Solutions

Classic Car Technology
Kits like this assembly from Year One can upgrade manual crank windows to power.

Integrating modern technologies like power door locks, power trunk release and power windows into a classic car are relatively simple options. Switches inside the vehicle can control these features, or you can choose to integrate them into the remote control from a car alarm to keep the vehicle looking stock. In modern cars, these functions are often electronically-controlled from the factory and only require some wiring and relays to make them part of a security system. In an older vehicle where these systems are mechanical, actuators and solenoids are available. The same goes for power windows. There are many kits available to power the factory crank system. If your windows aren’t running as smoothly as they should, new regulators are available from companies like Year One, LMC Truck and Classic Industries.

If you live in an area that is cool in the spring and fall, an aftermarket seat heater system is a great way to add comfort to your vehicle. We can integrate these heating panels into a bench or bucket seats with minimal effort. Most systems include a high/low switch to let you choose the warmth level.

Radar Detector and Laser Defense Systems

Classic Car Technology
Smartphone connection to radar systems can reduce exposed components.

You don’t need to be partaking in One Lap of America, The Cannonball Run or The Hot Rod Power Tour to be concerned about getting a speeding ticket. A run to the grocery store for burgers or a quick trip to the parts store for a gasket can be just as harrowing. Modern radar detectors have come a long way from the days of the lunchbox-sized units of the 1980s and 1990s. In fact, a modern custom-installed radar detector can be invisible. The radar receiver fits comfortably behind your front grille. Controlling the system can be accomplished using a smartphone, an IR remote control or by a compact keypad. Alerts are provided audibly, letting you know what kind of radar is in use and how strong the signal is.

Laser speed guns used to be infallible citation. However, now there are many options available to combat these systems by transmitting a distorted laser signal until you can ensure you are traveling at a legal speed. These compact transmitters are smaller than a deck of cards. They can fit in front grilles or air inlets.

Sound Deadening Reduces Noise and Adds Comfort

Perhaps one of the most popular upgrades for a classic car or hot rod is to install sound deadening. Sound deadening is available in several different materials. The most common are butyl rubber, mass-loaded vinyl and lead. Each serves to absorb sound energy to help make the interior of your vehicle quieter. The sound deadening material can be applied to the floor, roof, interior or exterior door and quarter panels, the trunk lid and on firewalls.

Very few classic vehicles include air conditioning and unless you are cruising on the Interstate, the interior can get quite hot. If you have a high-power engine and a large-diameter exhaust system, keeping the interior of your vehicle comfortable can be even more challenging. Most sound deadening materials also include a layer of aluminum to help prevent the transmission of heat into the vehicle interior. A layer of sound deadening can make a dramatic difference to the comfort of your vehicle. There are also several spray-on sound deadening and thermal control solutions available. Drop into your local mobile enhancement retailer to find the best solution for your application.

Classic Car Technology Add Comfort, Convenience and Safety

If your classic car or hot rod could use a little help from some modern features and functions, drop by your local mobile enhancement retailer. They can offer you a lot more than just audio system upgrades.

This article is written and produced by the team at www.BestCarAudio.com. Reproduction or use of any kind is prohibited without the express written permission of 1sixty8 media.

Filed Under: ARTICLES, Classic Car Audio, RESOURCE LIBRARY

Product Spotlight: Hertz VENEZIA V8 DSPx²

Hertz VENEZIA V8 DSPx²

The Hertz VENEZIA V8 DSPx² is a marine-grade amplifier with a built-in digital signal processor (DSP) designed to power and tune an entire audio system from a single compact, marine-ready chassis. Combining eight channels of amplification with advanced signal processing, it allows a professionally designed system to deliver clean, controlled sound in boats and other harsh outdoor environments.

Modern marine audio systems face unique challenges. Wind noise, engine noise and open-air listening environments make it difficult to achieve balanced, detailed sound. A DSP amplifier like the VENEZIA V8 DSPx² allows a professional technician to precisely tune the system so music remains clear and dynamic even when conditions are less than ideal.

By combining amplification and signal processing in one product, the VENEZIA V8 DSPx² simplifies system design while providing the flexibility needed for high-performance marine audio systems.

The Technology Behind the Hertz VENEZIA V8 DSPx²

Close-up of the Hertz VENEZIA V8 DSPx² marine amplifier power and signal connections.
Close-up product details reinforce the amplifier’s purpose-built marine design and professional-grade system integration.

The defining technology in the Hertz VENEZIA V8 DSPx² is the integration of a high-performance multi-channel amplifier with advanced digital signal processing. This approach allows a professional retailer to power speakers and precisely control how audio signals behave throughout the entire system.

A digital signal processor (DSP) works by analyzing and modifying the audio signal before it reaches the speakers. In a vehicle or marine environment, speaker locations, reflective surfaces and background noise can dramatically affect how music sounds. The DSP allows technicians to correct these issues by adjusting crossover points, equalization, time alignment and output levels so the system performs as a cohesive whole.

In the VENEZIA V8 DSPx², the DSP and amplifier sections are engineered to work together from the start. This integration reduces the need for separate components and allows signal processing adjustments to directly influence amplifier output. The result is more precise control over the system’s tonal balance and dynamics, which is especially important in open-air listening environments where clarity and projection matter.

Another important advantage of this integrated design is system flexibility. An eight-channel amplifier provides multiple configuration options for powering speakers and subwoofers throughout a vessel. The DSP makes it possible to tailor each channel’s response to match the speaker type and its location within the boat, helping create a balanced listening experience across multiple seating areas.

Marine environments also place special demands on electronics. Moisture, vibration and temperature changes can affect performance and reliability. By combining signal processing and amplification within a single purpose-built marine amplifier, Hertz reduces system complexity while maintaining the durability needed for life on the water.

Key Features and Capabilities

Connection panel on the Hertz VENEZIA V8 DSPx² marine DSP amplifier.
The rear panel highlights the amplifier’s integrated connectivity for multi-channel power and advanced system control.

The Hertz VENEZIA V8 DSPx² includes a range of technologies that support high-performance marine audio systems:

  • Eight Channels of Amplification: Provides the flexibility to power multiple speaker zones or combine channels for higher output when needed.
  • Integrated Digital Signal Processor (DSP): Allows professional system tuning including equalization, crossover configuration and time alignment for improved tonal balance.
  • Marine-Grade Construction: Designed to withstand moisture, salt exposure and vibration common in marine environments.
  • Compact System Architecture: Combining amplification and DSP processing reduces the number of components required in the system.
  • System Tuning Flexibility: Multiple output channels allow retailers to create tailored listening zones throughout the vessel.

Design And Construction

Top view of the Hertz VENEZIA V8 DSPx² marine DSP amplifier.
The low-profile chassis and clean industrial design reflect the amplifier’s premium marine-focused engineering.

The VENEZIA V8 DSPx² is engineered specifically for marine use, where durability is as important as performance. Marine electronics must withstand humidity, salt exposure and vibration without compromising reliability or sound quality.

Hertz designed the amplifier with protective materials and sealing strategies that help guard sensitive circuitry from environmental exposure. These measures help maintain consistent performance in challenging conditions often encountered on the water.

Thermal management is also critical in compact marine installations. Efficient amplifier design helps control heat buildup while maintaining stable output performance, even during extended listening sessions.

The result is a component built not only for sound quality but also for long-term reliability in marine environments.

Why This Product Matters for Vehicle Audio Upgrades

The Hertz VENEZIA V8 DSPx² matters because it allows a professionally designed audio system to deliver clear, balanced sound in environments where traditional systems struggle. By combining amplification and advanced signal processing, it gives system designers the tools needed to optimize every speaker in the system.

In open-air marine environments, music can easily become thin or uneven without proper tuning. A DSP amplifier allows professionals to shape the system’s response, so vocals, instruments and bass remain balanced across different seating areas.

For listeners, the result is a more immersive and enjoyable experience. Music sounds more natural, details become easier to hear and the system performs consistently even when background noise increases.

Upgrade Your Vehicle with Help from a Professional

Achieving the best performance from a DSP amplifier requires expert system design and precise tuning. A qualified specialty retailer has the tools and experience to integrate products like the Hertz VENEZIA V8 DSPx² into a system that delivers outstanding sound.

Visit the BestCarAudio.com Dealer Locator to find a trusted professional near you. A knowledgeable retailer can recommend the right equipment, design a system tailored to your vehicle and provide the expert calibration needed to bring your music to life.

This article is written and produced by the team at www.BestCarAudio.com. Reproduction or use of any kind is prohibited without the express written permission of 1sixty8 media.

Filed Under: ARTICLES, Marine Audio, PRODUCTS, RESOURCE LIBRARY Tagged With: Hertz

Avoid Costly Car Audio Installation Mistakes with Certified Professionals

Car Audio Installation Mistakes

Upgrading your vehicle with aftermarket electronics and accessories can improve comfort, convenience, and performance. From advanced audio systems to safety cameras and connectivity upgrades, modern enhancements offer real value. However, when these systems are installed incorrectly, they can introduce long-term problems that far outweigh any short-term savings.

Many of the most expensive automotive electrical issues begin with poor installation practices. Choosing a shop that employs certified salespeople, installation technicians, and specialists is one of the most effective ways to prevent these problems before they start.

Common Installation Errors That Lead to Major Problems

Improper aftermarket installations frequently look acceptable on the surface. Panels fit, systems power on, and everything appears to work. Unfortunately, hidden mistakes can remain unnoticed for months before causing failures.

Car Audio Installation MistakesOne common problem is improper grounding. When components are grounded to painted surfaces, thin metal, or unstable mounting points, resistance increases. This leads to voltage drops, audio system noise, overheating, and premature equipment failure.

Another common mistake is overburdened circuits. Adding multiple accessories to factory wiring without calculating the electrical load can strain vehicle systems. Over time, this stress damages wiring, connectors, and control modules.

Unprotected wiring is also a major concern. Wires routed through sharp metal edges, moving parts, or hot engine compartments without proper protection eventually wear through. This can result in shorts, intermittent failures, or even fire hazards.

Bypassed or disabled safety systems represent one of the most serious risks. Incorrect integration with airbags, advanced driver assistance systems (ADAS), and factory sensors can compromise vehicle safety. These problems are often invisible until an emergency occurs.

Why Electrical Problems Often Appear Months Later

Car Audio Installation MistakesUnlike mechanical failures, electrical problems often develop slowly. Heat cycles, vibration, moisture, and normal vehicle movement gradually weaken poor connections and damaged insulation.

A loose ground may work for months before corrosion increases resistance. A poorly protected wire may take thousands of miles to wear through. An overloaded circuit may survive until a hot summer day pushes it beyond its limits.

When failures finally appear, the original installation work is rarely suspected. Vehicle owners commonly experience confusing symptoms such as intermittent shutdowns, warning lights, drained batteries, or random system malfunctions. Diagnosing these issues becomes time-consuming and expensive.

The Hidden Cost of Cheap or Unqualified Installation

Car Audio Installation MistakesLow-cost installation may seem attractive at first, but repairs almost always cost more than proper installation. Tracking down electrical faults requires specialized tools, experience, and many hours of labor.

In some cases, damaged wiring harnesses must be replaced entirely. Control modules affected by voltage spikes can cost hundreds or thousands of dollars. Interior panels may need to be removed and reinstalled multiple times during diagnosis.

These hidden costs add up quickly. What initially saved a small amount of money can turn into a major financial setback. More importantly, unreliable electronics undermine your vehicle’s confidence and may affect its resale value.

How Certified Professionals Prevent These Problems

Shops that employ certified personnel follow organized procedures and technical standards designed for modern vehicles. Programs such as the Mobile Electronics Certified Professional (MECP) certification ensure that technicians and specialists receive formal training and ongoing education.

Car Audio Installation MistakesCertified staff understand how to calculate electrical loads and determine whether factory systems can support new accessories. They know when additional power distribution, relays, or upgraded wiring is required.

They apply proper installation protection, including abrasion-resistant loom, grommets, heat shielding, and secure mounting methods. Every connection is made using appropriate terminals, crimps, and insulation techniques.

Most importantly, certified professionals follow safety procedures when working around airbags, sensors, and advanced driver assistance systems (ADAS). They integrate new equipment without interfering with factory protections.

Early Problem Detection Through Professional Diagnostics

Car Audio Installation MistakesExperienced and trained technicians do more than install equipment. They evaluate the entire vehicle system before, during, and after installation. Voltage testing, resistance measurements, and system scans help identify weaknesses early.

If a factory ground point is marginal, they correct it. If battery capacity is insufficient, they recommend upgrades. If a vehicle shows early signs of electrical stress, it is addressed before damage occurs.

This active approach prevents small concerns from becoming major failures. It also ensures that your upgrades function reliably in real-world driving conditions.

Prevention Is Always Better Than Repair

Repairing electrical problems is rarely simple. It frequently involves disassembling large portions of the vehicle and tracing wiring through tight spaces. Prevention, on the other hand, happens during installation and costs far less.

By choosing a shop with certified salespeople and installation technicians, you invest in lasting reliability. You reduce the risk of breakdowns, unanticipated repairs, and safety compromises. Your systems perform as intended, and your vehicle retains its integrity.

Choosing Confidence Over Compromise

Car Audio Installation MistakesAftermarket upgrades should improve your driving experience, not create future headaches. The safest and most economical approach is to prioritize prevention over repair from the beginning.

Selecting a professional shop with certified staff makes certain that loads are calculated correctly, wiring is protected, and safety systems remain intact. Their training and diagnostic skills help avoid mistakes that lead to hidden costs months later.

When you choose certified professionals, you are choosing dependability, safety, and peace of mind. That decision protects both your investment and your vehicle for years to come.

This article is written and produced by the team at www.BestCarAudio.com. Reproduction or use of any kind is prohibited without the express written permission of 1sixty8 media.

Filed Under: ARTICLES, Car Audio, PRODUCTS, RESOURCE LIBRARY Tagged With: MECP

  • « Previous Page
  • 1
  • 2
  • 3
  • 4
  • …
  • 37
  • Next Page »

Recent Articles

A mechanic testing a vehicle's battery with a meter

Important Tips for Car Battery Maintenance

June 7, 2026 

It’s early 2018, and North America is still contending with a deep freeze and some nasty winter weather. Erie, Pennsylvania, got more than 50 inches of snow over the holidays, and … [Read More...]

Drone XT GPS Tracker

Product Spotlight: Drone XT GPS Tracker

June 1, 2026 

Protecting your vehicles or equipment has never been more important, and a GPS tracking system is one of the smartest upgrades you can make. The new Drone XT from Firstech gives … [Read More...]

A mechanic fixing a car engine

Why Certified Professionals Deliver Faster, More Accurate, and More Reliable Vehicle Upgrades

May 18, 2026 

When a vehicle is upgraded or repaired, the quality of the work depends heavily on who performs it. Certified professionals bring formal training, verified skills, and adherence to … [Read More...]

The Audison APBX-10 AS2

Product Spotlight: Audison APBX 10 AS2

May 11, 2026 

One of the best upgrades you can make to your car audio system is to add a high-quality subwoofer. Whether you are working with a simple factory-installed radio and speaker system … [Read More...]

Testimonials

Very Friendly Staff

Very friendly staff, knowledgeable group . Needed help on my remote starter, they got me back up and running in no time . They also do amazing tint jobs!!

I recommend then to everyone!

Super great place to get lots of custom things done. Very nice, very knowledgeable and very fare prices. I recommend to everyone I know.

Will be going back for sure!

Very happy with how the tint came out. Professional and friendly. Will be going back for sure.

Subscribe to Our Website

Enter your email address to subscribe to our website and receive notifications of new posts by email.

Location

55 Woodmont Road, Milford, CT 06460

Get Directions to Speed of Sound Technologies

Connect With Us

  • Facebook
  • Instagram

Services

  • Car Audio
  • Custom Installation
  • Driver Safety
  • Radar/Laser Detectors
  • Remote Starters
  • Truck Accessories
  • Vehicle Security
  • Window Tint

Hours

Monday, Tuesday, Wednesday, Thursday, Friday9:00 am – 6:00 pm
Saturday9:00 am – 5:00 pm

Closed
Sunday

Copyright © 2026 Speed of Sound Technologies · Privacy Policy · Website by 1sixty8 media, inc. · Log in

Loading Comments...